Showing posts with label less than 200 calories. Show all posts

Saturday, February 15, 2014

healthy classic banana bread


I wouldn't say that I use baked goods to bribe people, but I do think there is a certain incentive to agree to a favor when there are, let's say, cookies involved. That's what happened a few weeks ago when I had the opportunity to photograph the National Cathedral and hoped to borrow some extra equipment from a friend. I generally shoot with a light body and a short lens, but I wanted a few back up options, knowing that I probably wouldn't get the chance to shoot from the rafters of the building again. In return, I promised a loaf of banana bread.

To be honest, my Mom is kind the banana bread guru in my life and I rarely make it myself. Nevertheless, I decided that having a healthy version in my arsenal wouldn't hurt, especially given how comforting a warm slice can be in the dead of winter when I'm dreaming of picking fresh fruit and dressing in less than three layers.

I took advantage of the snow day (fellow D.C.-ers, are you dug out yet?) and the super ripe bananas I had been waiting on to test out this lightened-up version of a classic quick bread. Embarrassingly, I doubled the butter needed to get this recipe started and decided it was a sign to just make a double batch! I ended up with a full loaf and twelve muffins, which means I've got snacks for the week. I believe the term "happy accident" would be appropriate here.


Quick tip: I keep my baking bananas in a brown paper bag with the top folded over. Science tells me that helps them ripen faster than just sitting on your counter due to gases being emitted and the concentration of said gases and other concepts that I just don't have room in my brain for. All I know is, it works.
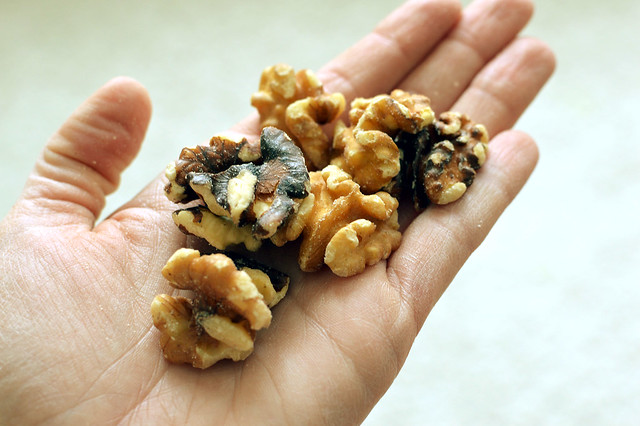

Banana bread is great on its own, but walnut and chocolate chips really take it to the next level. I pulled out some unbroken walnuts to decorate the top and give it that professional "did YOU make this?" quality.


Once I had all my dry ingredients ready to go, I added the walnuts and chocolate and gave it a good toss in the flour mixture. I find the coating helps suspend them in the batter and helps avoid having a bottom layer consisting of chocolate and nuts. 
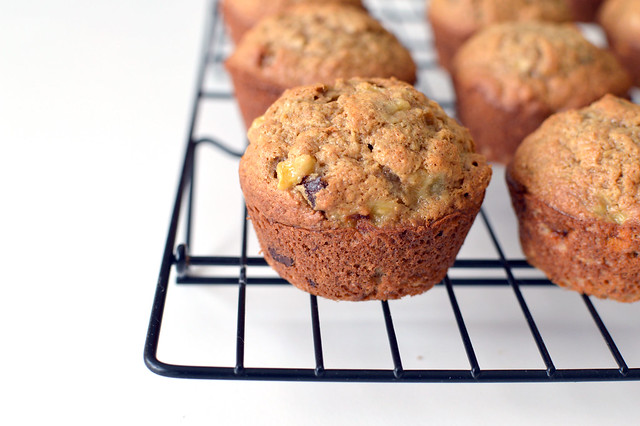

Also, since I live on the wild side, while most recipes call for you to really mash the bananas well, I like to be a little more gentle to I get pieces of fruit throughout the bread. (Okay, maybe I just really like mix-ins! You never want to share a pint of ice cream with me, unless plain vanilla is your thing.)


Since the loaf was a gift, you'll have to trust that the muffins adequately represent the perfect texture of this bread. (For those of you going the muffin route, they only take about 14-17 minutes in the oven!) 


The best part about banana bread? It really does get better over time. I find that it's best the second or third day, which makes it a great bake-ahead project.

Healthy Classic Banana Bread
Adapted from Cooking Light
Yields 14 servings

Ingredients:

1 cup whole wheat flour
1 cup all-purpose flour
3/4 teaspoon baking soda
1 teaspoon cinnamon
1/2 teaspoon salt
1/2 cup brown sugar
1/4 cup white sugar
1/4 cup butter, softened
2 large eggs
1 1/2 mashed ripe bananas (about 2 bananas)
1/3 cup 0% plain Greek yogurt (feel free to use honey, banana, or vanilla flavors)
1 teaspoon vanilla extract

Optional: 1/2 to 3/4 cup mix-ins

Directions:

1. Preheat oven to 350 degrees.
2. Cream butter and sugars together on medium speed, about one minute. Add eggs, one at a time, beating well after each addition.
3. Add banana, yogurt, and vanilla, and beat on medium speed until blended.
4. Sift or whisk together flours, baking soda, cinnamon, and salt.
5. Add dry mixture to wet mixture and combine on low until just blended. Do not over-mix! (I avoid this by letting my stand mixer do about 50% of the work, then mixing it the rest of the way by hand. Over-mixing leads to tough breads, which no one likes!).
6. Spoon batter into a loaf pan that has been greased with cooking spray and bake for 40-45 minutes, or until a knife speared through the center comes out clean.
7. Cool on wire rack for ten minutes, remove from pan, and let cool completely. 

Nutritional Information:

Calories: 165, Fat: 3.85g, Cholesterol: 39mg, Carbs: 28g, Fiber: 2g, Protein: 4.5g

(For comparison, Starbucks' Banana Bread has nearly 500 calories a slice!)

Monday, September 12, 2011

browned butter blondies

DSC_0771 sq


i've been gone for a while. well, longer than a while. i've missed baking and i've missed my readers and today i decided to take a few hours, un-busy myself, and make something spectacular to get myself back in to the blogging groove. that treat, ladies and gentleman, is browned butter blondies. they actually double as the best air fresheners money can buy - and these are actually edible!


DSC_0737 sm


it all starts with butter. five totally magical words. i chopped my butter into rough tablespoons and let them melt over medium heat, swirling every thirty seconds or so. once it all melted i grabbed a spoon and stirred constantly, fearing that i would end up with hardened caramel fused permanently to the bottom of my pan.


DSC_0758 sm


the end result is a bowl of pure heaven. liquidy caramel perfection that will take the every day blondie, which i normally don't care very much for, over the top.


DSC_0761 sm


with very little effort (seriously, no mixer needed!) after the butter-melting, you have yourself a pan of blondies ready for the oven. i added walnuts to half of mine, due to a request from the peanut gallery/baking assistants, but you can add or not add any toppings you'd like. oh, and good luck trying keep yourself from eating all this raw.


cat naps


then you have to wait the thirty grueling minutes until those bad boys can come out of the oven. to pass the time i laid on the floor, supported by my new and on sale target pillows, and kept an eye on my cat. she decided the best place for a nap was directly under my tripod, which i thought would end in disaster. she's more responsible than i give her credit for.


DSC_0764 sm


then, the moment of truth. these blondies have a soft, melt-in-your-mouth center and a delicious and crispy edge - my personal favorite part. the walnuts added a really nice nutty flavor and crunch that complimented the browned well. we also tossed around the idea of incorporating bananas somehow, an idea that might be featured on a post in the near future.

oh, and this recipe was adapted from cooking light, so it is surprisingly not too terrible for you. i ended up halving the recipe, what i usually do when i try anything for the first time, but i would definitely recommend making an entire batch. these will go fast. 


browned butter blondies
adapted from cooking light
yields 24 servings

ingredients:

9 ounces (about 2 cups) all purpose flour
2 1/2 cups packed light brown sugar
2 teaspoons baking powder
1/2 teaspoon salt
10 tablespoons unsalted butter
2 eggs
1 egg whites

directions:

1. preheat oven to 350 degrees. 
2. weigh or measure flour, sugar, baking power, and salt in a large bowl. whisk to combine.
3. slice butter into rough tablespoons and cook in a small skillet over medium-high heat until lightly browned, stirring frequently once butter melts. pour into bowl and let cool, about ten minutes.
4. once cooled, combine eggs and butter with a whisk. 
5. pour butter mixture over flour mixture and fold together until just combined. 
6. pour batter into a greased 9x13 baking pan coated with cooking spray and smooth top with spatula.
7. bake for 30 minutes or until a wooden toothpick inserted in center comes out clean.
8. cool completely on a wire rack before cutting.

nutritional information:

calories: 170, fat: 4.8g, protein: 1.9g, carbs: 30.5g, fiber: 0.3g, cholesterol: 13mg, sodium: 108mg

as always, thanks for reading & happy baking!
amanda

ps: my sister & i are starting a small baking company in the dc area, so there's a good chance i may be testing out new recipes here. stay tuned for more!


Friday, April 29, 2011

guilt free lava cake for one


man, i always forget what a pain the moving process is. between spending twenty hours in the car last weekend (preliminary apartment hunting) and packing up everything i own (craigslist gets the rest!) i have barely had enough time to sleep, much less blog. 

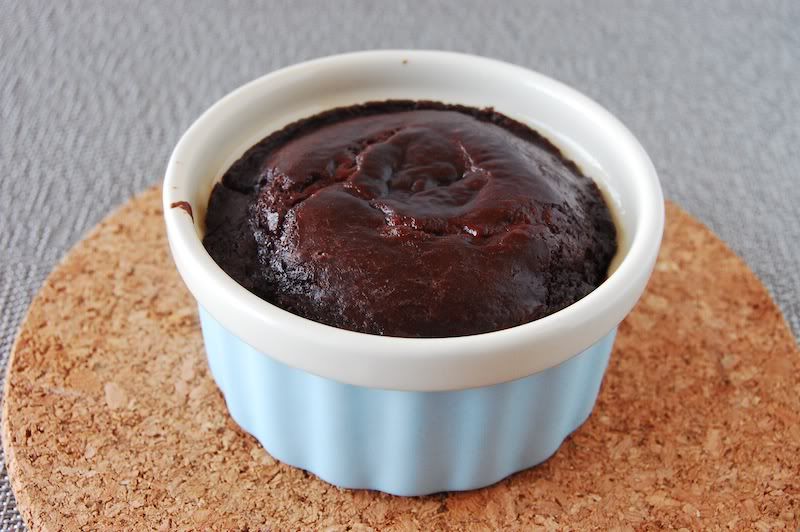
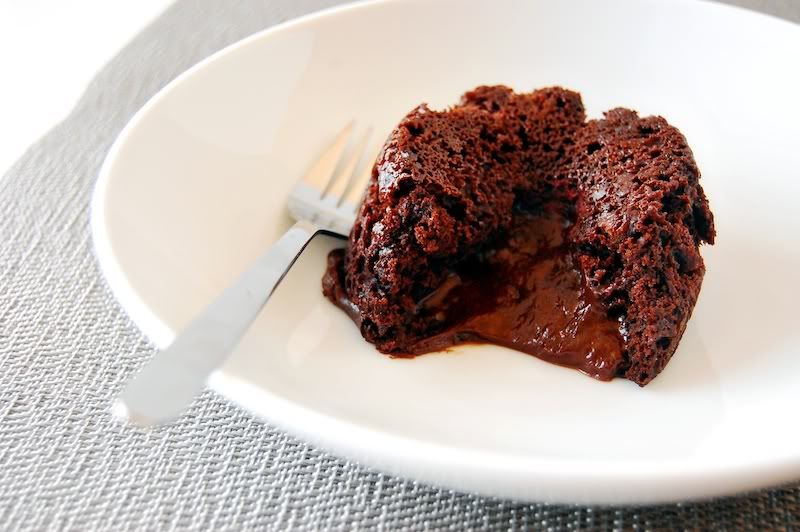
to make up for my lengthly absence i come bearing lava cake. that's right, chocolate-y goodness that's a brownie on the outside and warm pudding on the inside. i don't even like pudding and i've already made this cake twice this week - it's that good. 

on top of all that, this is also a recipe for one - perfect for when the mood strikes you, but won't leave you with a baker's dozen on the kitchen counter tempting you.


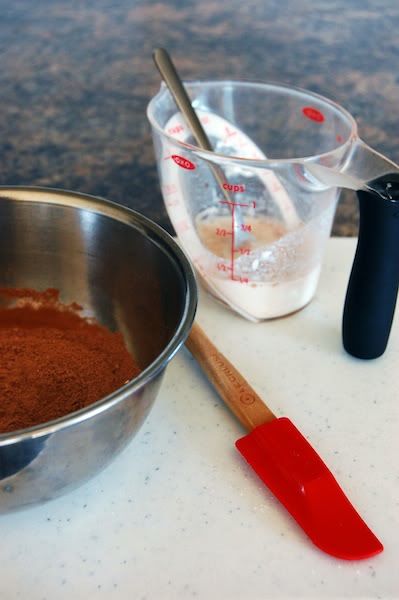
this is a shockingly simple recipe for how elaborate the final product seems to be. you just need one small bowl for dry ingredients and another vessel of some kind for wet. 


i baked my cake in a 7 ounce ramekin, which is a fancy word for a small heat proof bowl. for as much as i use the ramekins i have - seriously, ice cream, microwaving anything and everything, sauce-making, snack-holding, etc. - they do not get nearly enough praise in my kitchen. if you don't have a set of these i highly recommend picking up one or fifteen. you can thank me later!


when you take your cake out of the oven you want the sides and top to be fairly set, but definitely not cooked through. i found that to take around 15 minutes in my oven, but in the name of honesty i will say the first time i made this it i left it in far too long (i got a brownie) and the second far too short (pudding soup). not that i minded eating either, but the goal is an even split between the two extremes.


though i know from personal experience how tempting it is to dig right into your lava cake while it's in a piping hot ramekin, it isn't a good idea. seriously, i think i no longer have a fingerprint on my ring finger. what you want to do is grab a larger plate or dish and invert your ramekin onto that. you will look and feel like a total professional, promise.


now, i give you permission to sit down with your very own lava cake and enjoy every last bite. and, in case you forgot, the beauty of a cake for one is that no one will be around to judge you as you lick the plate.


guilt free lava cake for one


yields 1 cake

ingredients:

2 1/2 tablespoons all-purpose flour
1 1/2 tablespoons granulated sugar
1 heaping tablespoon dutch-processed cocoa
1/8 teaspoon baking soda
pinch of salt
3 tablespoons skim milk
1 tablespoon non-fat yogurt
1/4 teaspoon vanilla

directions:

1. preheat oven to 350 degrees.

2. whisk together flour, sugar, cocoa, baking soda, and salt in a small bowl.

3. mix milk, yogurt, and vanilla in separate bowl.

4. pour wet ingredients into bowl of dry ingredients and stir until combined.

5. grease a 7 ounce ramekin with cooking spray. pour batter into ramekin and bake for 12-16 minutes or until edges and top of cake are set.

6. let cake cool for 1 minute then invert onto larger plate or bowl. enjoy!


nutritional information:


calories: 171, fat: 1.24g, sodium: 185mg, carbs: 39g, fiber: 4.5g, sugars: 19g, protein: 5.72g.


thanks for reading & happy baking!


amanda

Sunday, February 27, 2011

cinnamon sugar donut muffins!


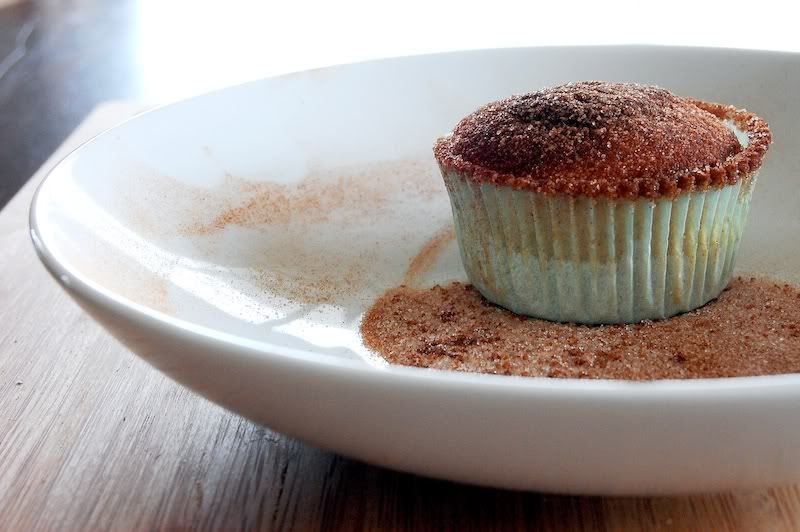
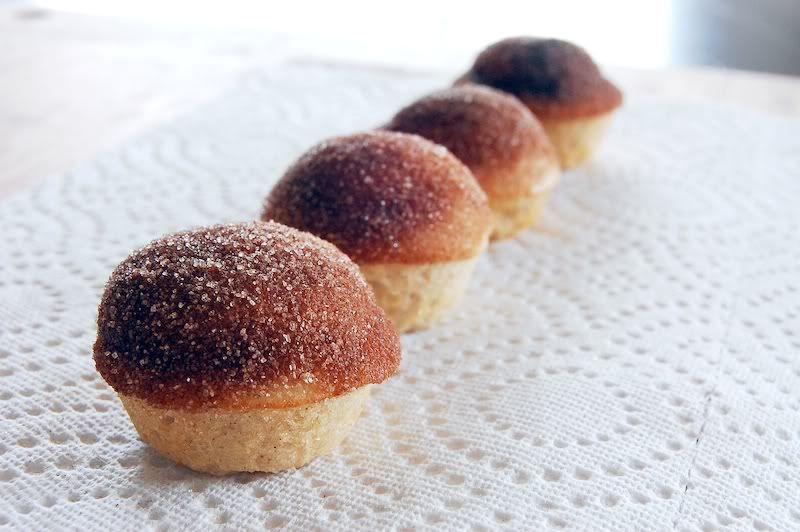
these donut-muffin hybrids (duffins? monuts?) may not be the most beautiful things to come out of my kitchen, but they sure are some of the most delicious. seriously, they're tied with my new favorite leave-in conditioner for "things that have completely rocked my weekend."

if you're not convinced yet, i've narrowed down the top 5 reasons why you should drop what you're doing and make these right now:

1. you don't need any fancy kitchen gadgets to make these, just a few bowls and good whisk. sometimes i dread lugging out the stand mixer and consider mixing ingredients together a form of exercise. well, it kind of is! strength training? anyone?

2. you also don't need a donut pan. don't get me wrong, they are totally cute and very popular but go against my rule of only buying kitchen gadgets that serve more than one purpose

3. they are totally kid-friendly and come together in an hour. none of the pesky waiting around to start enjoying cinnamon-sugary bliss.

4. i cut the calories and fat from the original recipe a tremendous amount by substituting a few ingredients. this means, guiltless donut consumption! (when was the last time THAT happened?)

5. last but not least, they are 100% delicious and perfect at any time of the day. also, who could turn down a DONUT shaped like a MUFFIN?

i know you probably haven't made it to the end of the list without running to your kitchens to throw this together, but i'll continue with the post for when you come back, donut in hand.


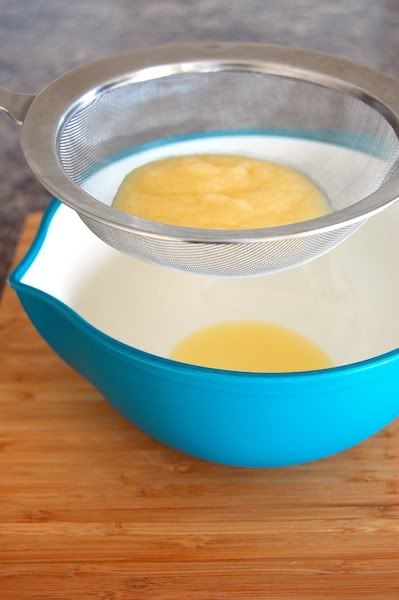
though i don't consider myself a "low fat" or "light" baker, i do have a few tricks up my sleeve on how to cut some of the unnecessary bad-for-you ingredients from baked goods. one great trick is substituting unsweetened applesauce for oils, which i did in my modified version of this recipe. 

to use this technique, just put however much applesauce your recipe calls for in a sieve over a bowl and let it sit for 15-20 minutes. gravity will pull the majority of the moisture out of the applesauce, which would otherwise make your final product overly runny. if you don't have a sieve, you can mimic the effect by putting the applesauce between several layers of paper towels. it's a little messier, but it works!


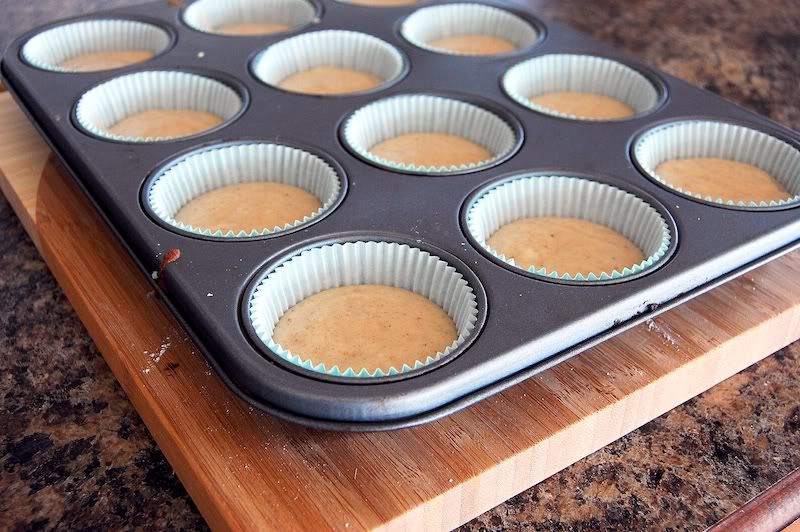
these babies puffed up a lot, so i was glad that i only filled the tins up halfway. i used paper liners for the bigger version of the donuts (i ended up making minis too!) because i'm taking them to work and feel weird handing out unwrapped baked goods, but i think it takes away from their beauty a little. feel free to scrap the liners and just give your muffin tins a good spray before adding the batter.


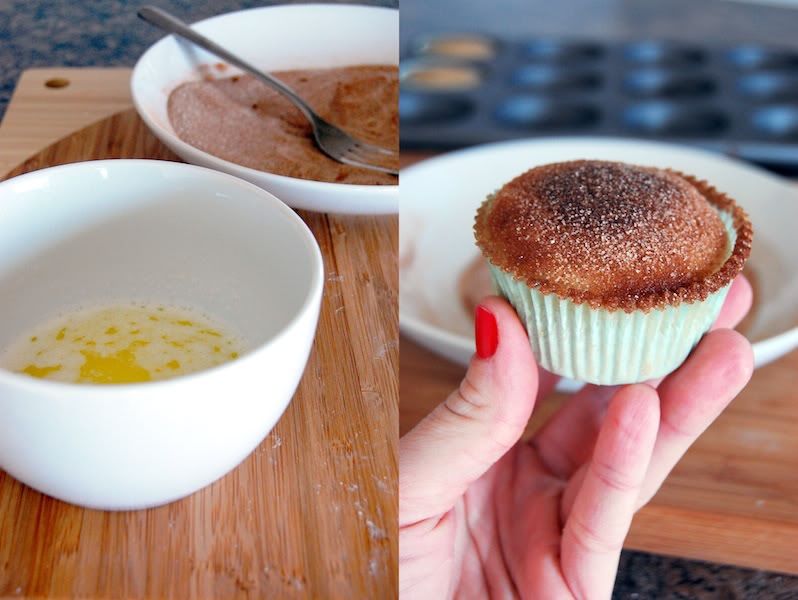
another way i cut the calories from these was by not submerging the entire donut in butter before rolling it in cinnamon sugar. instead, i just dunked the tops! i don't feel like i lost any of the effect or taste at all, but you can feel free to coat your entire donut if you're feeling crazy.


this recipe was so easy to make and would be a quick and easy brunch treat to whip up some lazy morning. they are also super versatile and could be just as easily glazed or stuffed with jelly - my personal favorite. the few substitutions i made didn't detract at all from the flavor or taste, but instead just cut the calories down from 275 to 162 - an enormous difference.

cinnamon sugar donut muffins


adapted from tasty kitchen
yields 12-13 standard-sized muffins (or 3 dozen mini-muffins)

ingredients:

1 3/4 cups all purpose flour
1 1/2 teaspoon baking powder
1/2 teaspoon salt
1/2 teaspoon nutmeg
1/2 teaspoon cinnamon
1/3 cup unsweetened applesauce, strained
1 tablespoon vegetable oil
3/4 cups granulated sugar
1 large egg
3/4 skim milk

for the topping:

2 tablespoons melted butter
1/4 cup granulated sugar
2 teaspoons cinnamon

1. strain applesauce via sieve or paper towels for 15-20 minutes.

2. combine flour, baking powder, salt, nutmeg, and cinnamon in a bowl and set aside.

3. in a large bowl, whisk together applesauce, oil, sugar, egg, and milk until combined.

4. slowly add dry ingredients to wet ingredients and whisk together until no large lumps remain.

5. scoop into muffin tins and bake at 350 degrees for 15-17 minutes. (mini versions only need to bake for 7-8!). do not over-bake!

6. while your donuts are baking, melt butter in a heatproof bowl in the microwave. in a separate dish, mix together sugar & cinnamon until combined.

7. take donuts out of the oven and let rest for 1-2 minutes. while still hot, shake out of muffin tins. dip tops into butter, then sugar mixture, then let dry on wire rack for 5-10 minutes.

nutritional information:


calories: 162, fat: 3.25g, cholesterol: 21mg, sodium: 159mg, carbs: 30g, fiber: 1g, sugar: 16g, protein: 2.75g. 


before i go, i'd like to say a quick "thank you" to all the new readers that have been visiting my blog recently. welcome! if you have any questions, comments, suggestions, or requests, please feel free to get in touch via comment or at girlwhobakes@gmail.com. also, if you would like to know more about why i started this blog, or why i have all the nutritional information listed for my recipes, please check out my first entry right over here


as always, thanks for reading & happy baking!


amanda

Thursday, January 27, 2011

fleur de sel caramel brownies


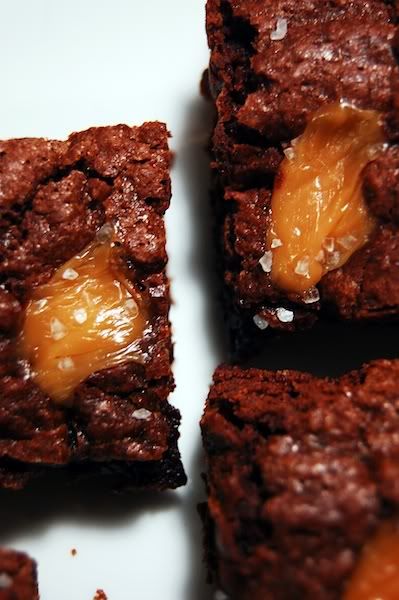
have you ever experienced the combination of chocolate and salt? i'm really hoping you have, because if you haven't i'm going to have to pack up my car with a whole lot of it and go on a major road trip. seriously folks, it's phenomenal. the salt, however weird this may sound, completely enhances the depth of the chocolate and takes it to a whole other level. okay, i'm done raving!


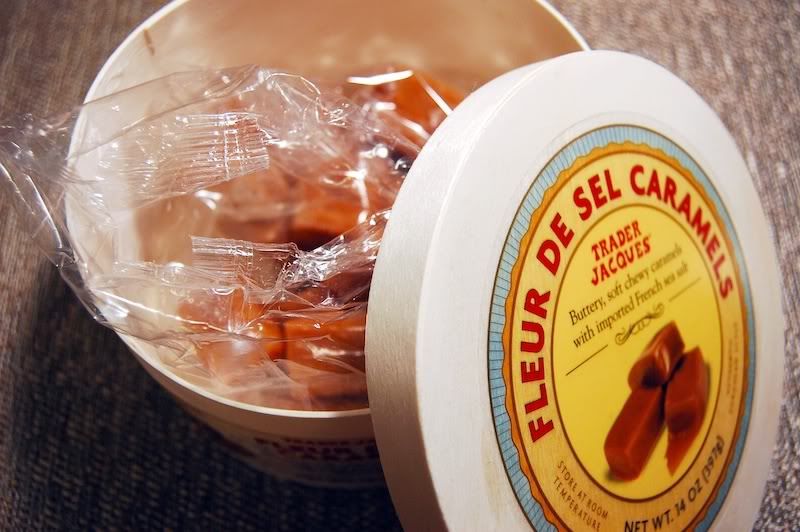
these brownies came together when i found some trader joe's fleur de sel caramels laying around my house and decided to adapt a brownie recipe i had saved. if you don't have caramels, don't worry. you can substitute a quarter cup of anything your heart desires - chopped walnuts, toffee, or chocolate chips would all be delicious.


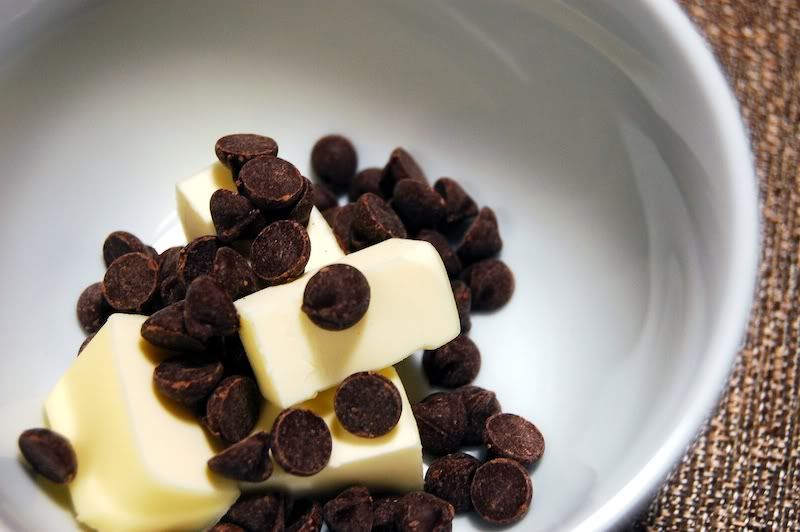
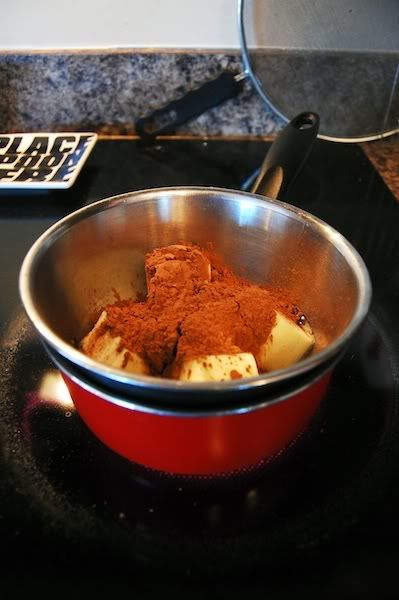
whenever i take the double-boiler-shortcut and use the microwave i use the defrost setting so that the heat isn't as aggressive.


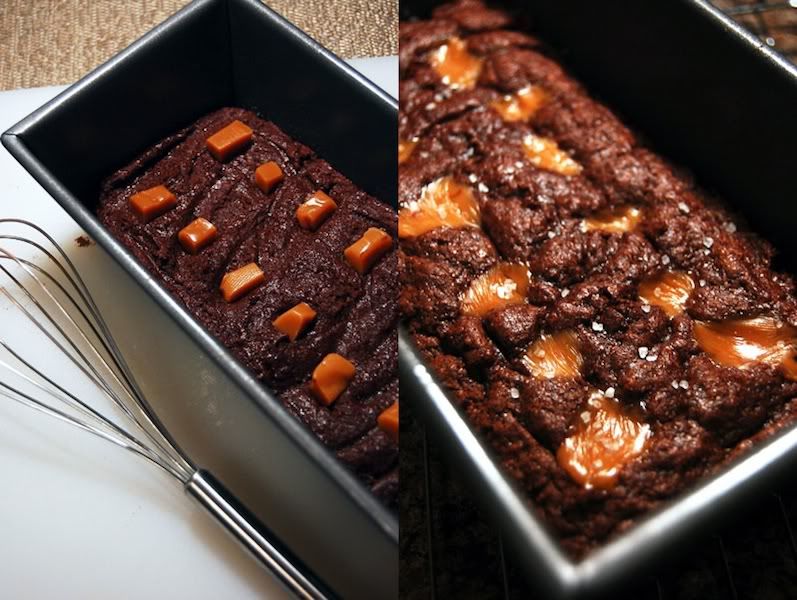
the dough was thicker than i expected and it took a little working to get it spread out, but trust me - it was worth it. i cut the caramels into quarters and gently pressed them into the top of the dough. once it baked, i sprinkled the top with sea salt for that extra punch.

side note: when i bake i generally halve the batch because i hate to have too many tempting leftovers around the house, hence the loaf pan instead of the 9x9 the recipe calls for!


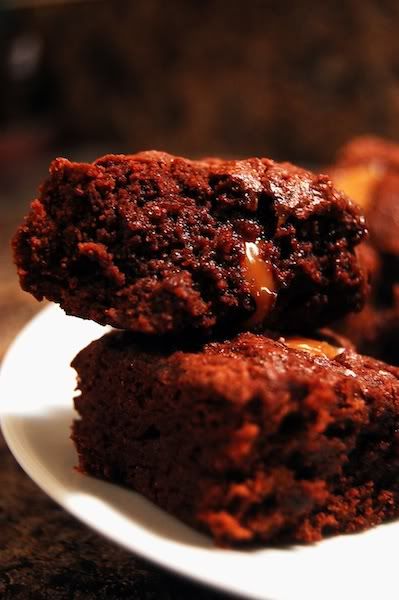
i ended up yielding eight pretty sizable brownies, around an inch and a half by and inch and a half. they are so decadent that i can barely make it through one, which is saying a lot given how much i love this combo!

fleur de sel caramel brownies

yields 20 servings
adapted from cooking light

preheat oven to 350°

2 tablespoons instant coffee granules
1/4 cup hot water
1/4 cup butter
1/4 cup semisweet chocolate chips
1 1/2 cups all-purpose flour
1 1/3 cups sugar
1/2 cup unsweetened cocoa
1 teaspoon baking powder
1/2 teaspoon salt
1 teaspoon vanilla extract
2 large eggs
1/4 cup worth of caramel pieces

1. coat the bottom of a 9x9 baking pan with cooking spray.

2. combine coffee granules and 1/4 cup of hot water, stir until the granules dissolve.

3. combine butter and chocolate chips in a small heatproof bowl on the defrost setting until the butter melts, stir until the chocolate is smooth.

4. combine flour, sugar, cocoa, baking powder, and salt in a large bowl, stirring with a whisk.

5. combine coffee mixture, butter/chocolate mixture, vanilla, and eggs until combined.

6. add wet mixture to dry until just combined and spread evenly into prepared pan, then place caramel quarters on top.

7. bake for 22-25 minutes until the middle is set. let cool in pan until warm and then turn out and complete cooling on a wire rack.

nutritional information:


calories: 182, fat: 4g, cholesterol: 27mg, sodium: 90mg, carbs: 24g, fiber: 1.1g, sugars: 15g, protein: 2.14g. 


thanks for reading & happy baking!

amanda

Sunday, January 23, 2011

dark chocolate cupcakes with peanut butter frosting!


my name is amanda and i purposefully hide candy from myself. yup, that's right, at any given time there are probably two or three different kinds of candy stashed out of sight with the idea that, if i really want it, i'll find it. if i'm eating because i'm bored or anxious i'll grab an apple or hummus or whatever is at the front of my fridge, because i'm actually quite lazy.

i know, this plans seems pretty genius. you don't have to tell me twice. the only problem is that i have perfected my technique so much that i sometimes forget there's even candy there. i found myself in this very situation yesterday, when while cleaning out the pantry i found a target bag full of fun size reese's. cups, pieces, and fastbreaks - the peanut-buttery trifecta!

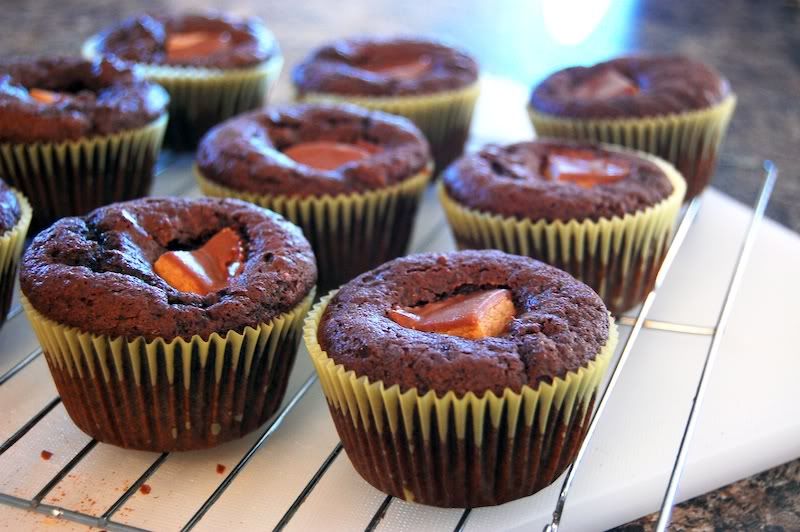
faced with this dilemma i immediately went to my saved recipes and found something that would give me an excuse to use up all these treats and force them on my co-workers tomorrow. the solution? dark chocolate cupcakes, stuffed with reese's cups, topped with peanut butter frosting.


the stash i found. i cannot believe this was just hanging out in my pantry!  i should have been binging on them long ago!


to melt the combination of chocolate, cocoa, and butter, the recipe calls for a double-boiler. i made my own hodge-podge version out of a heatproof bowl over a small saucepan, but you can also do this in the microwave to save time. if you're taking this route though, i would recommend using the defrost setting - it will be more gentle on your chocolate!


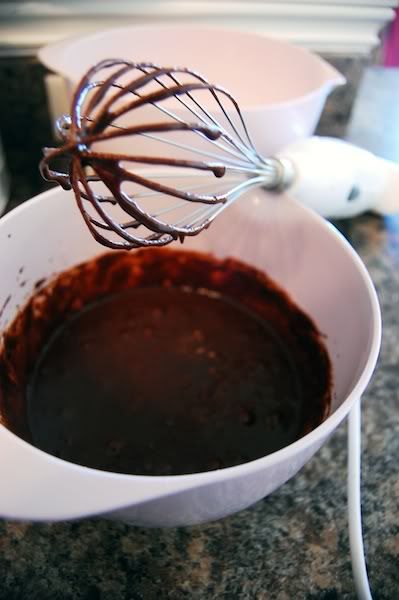
i used the whisk attachment for my immersion blender. i love using this kitchen gadget when i don't feel like breaking out the big stand mixer. note: i am a big gadget nerd.
i stuck peanut butter cup quarters into the center of each cupcake while i was rotating the pan mid-bake for a secret surprise! this step is obviously optional, but highly suggested.


i had left over batter - shocking - so i made half a dozen mini-cupcakes and decorated them with reese's pieces for extra adorability. seriously, how cute are they?


dark chocolate cupcakes

yields 15 regular sized cupcakes, or 1 dozen + 6 minis!
adapted from cooks illustrated

preheat over to 350 degrees fahrenheit

8 tablespoons unsalted butter at room temperature, cut into 4 pieces
2 ounces bittersweet chocolate chips
1/2 cup dutch-processed cocoa powder
3/4 cup all-purpose flour
1/2 teaspoon baking soda
3/4 teaspoon baking powder
2 eggs
3/4 cup granulated sugar
1 teaspoon vanilla extract
1/2 teaspoon table salt
1/2 cup sour cream (i used a light version & it was perfect!)

1. place butter, chocolate, and cocoa in a heat-proof bowl. set bowl over saucepan with two inches of simmering water. gently stir butter and chocolate until melted and combined. set aside until mixture is warm. this step can be substituted for microwave.

2. in a small bowl, whisk flour, baking soda, and baking powder together.

3. in a large bowl, whisk eggs together until combined. add sugar, vanilla, and salt until fully incorporated. add cooled chocolate mixture and whisk together. sift one-third of flour mixture over chocolate mixture and whisk until combined. stir in sour cream until combined, and then sift remaining flour mixture over and stir until batter is thick.

4. fill cupcake liners two-thirds full and bake until knife or cake tester in center of cupcake comes out with a few crumbs - about 18 minutes. if adding to batter, place in center of cupcake half-way through baking. if making mini-cupcakes, only bake for 7-8 minutes.

peanut butter frosting
  
note on frosting: i tend to frost on the conservative side. i think a lot of people go nuts with frosting because it is so delicious, but there is something to be said about too much of a good thing. plus, i don't want the cake portion of the show to be ignored or overpowered! that being said, i had a bunch of extra frosting left over, probably enough to frost two to four more cupcakes. just a heads up!
 
1 cup confectioners’ sugar, sifted
3/4 cup creamy peanut butter
5 tablespoons unsalted butter, at room temperature
¾ teaspoon vanilla extract
¼ teaspoon kosher salt
3-4 tablespoons heavy cream or half & half

1. place butter and sugar in bowl of stand mixer and beat with paddle attachment until combined and creamy.

2. add vanilla extract, salt, and peanut butter, and combine.

3. add heavy cream one tablespoon at a time until frosting reaches desired consistency.

nutritional information:

for cupcakes: calories: 172, fat: 9.14g, cholesterol: 51mg, sodium: 171mg, carbs: 21g, fiber: 1.4g, sugars: 10.89g, protein: 2.72g. 

for frosting: calories: 119, fat: 8.62g, cholesterol: 10mg, sodium: 36mg, carbs: 7.85g, fiber: .64g, sugars: 6.5g, protein: 2.8g.

so, the whole cupcake comes out to about 300 calories! mini-versions are 1/3 of that, so only 100!


thanks for reading & happy baking!

amanda