Showing posts with label bread. Show all posts

Monday, February 24, 2014

low fat whole wheat cinnamon rolls (no yeast required!)


I like to think I have pretty good self control. I don't buy shoes just because they're on sale. I make myself coffee at home every day instead of splurging at Starbucks. I avoid eye contact with the Reese's peanut butter cups as I'm checking out of the grocery store. 

But, we all have our weaknesses, and when it comes to the smell of warm, pillowy, cinnamon sugar goodness, I'm a goner. (Seriously, when I'm alone in an airport, I feel like I have to strategically plot my course to avoid any and all Cinnabons.)

In an effort to satisfy these cravings, and not end up missing a flight just to be found under a pile of empty Cinnabon containers, I had to find an easy, healthy, and quick recipe for cinnamon rolls that I could feel good about. These babies don't need any yeast, take about thirty minutes to whip up, and reheat like a dream. Basically, perfection. My self control thanks me. 


I will admit, things start out a little weird, but trust me on this one. Applesauce is cut into the flour mixture to get the dough started. You can use a pastry cutter for this, but I prefer to use two forks - the last thing I need is another kitchen gadget! Then, the almost-dough gets chilled for ten minutes.


This is a very handy time to get your cinnamon-sugar mixture together and get your butter melted for the filling. (Wouldn't be a cinnamon roll without it!)
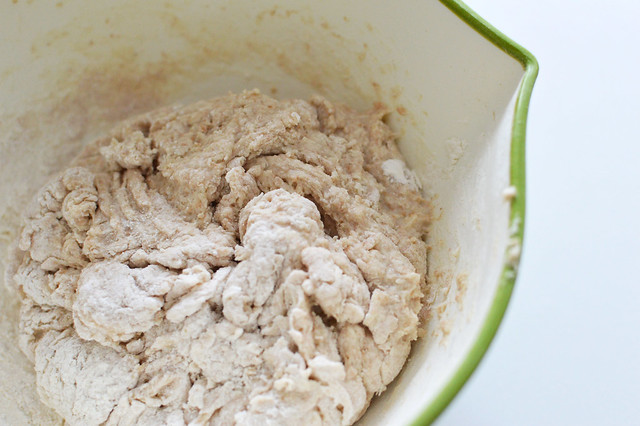

With the addition of milk and vinegar, the dough comes together easily. I did 80% of the work in the bowl and finished the kneading off with my hands on the counter. Feel free to add a little more flour if your dough is too tacky. 
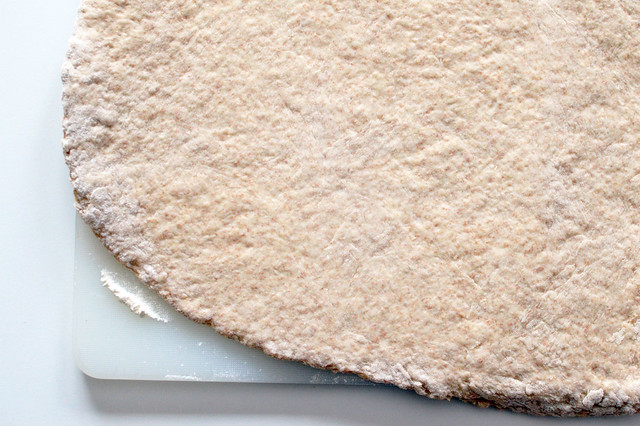

Once you get your dough rolled out to about a 1/2 inch thick, things started to get a little messy. At this point, you want to brush on the melted butter, sprinkle the cinnamon sugar mixture evenly, and roll the dough into a log. Once it's rolled up, you can even out any bulges - I find my middle to always get a little thicker than the rest. Then, slice your log into twelve even sections.
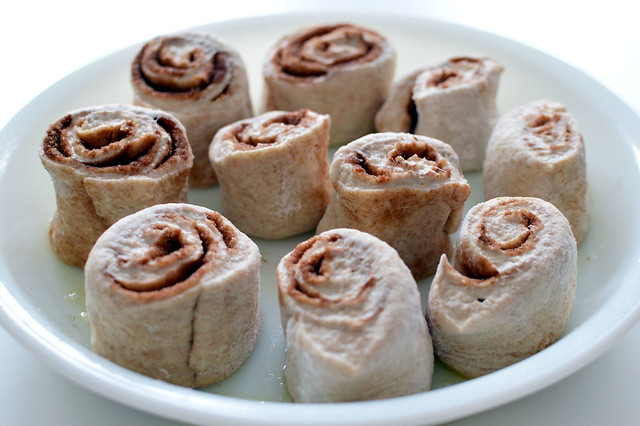

Okay, okay. You caught me. I totally said twelve, but only have ten. It was early and I was feeling generous! Either way, you want to make sure you space your rolls out so they have room to grow and bake all the way through.


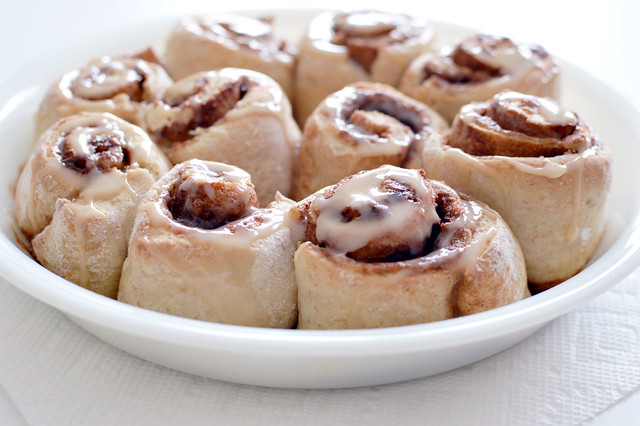
When they come out of the oven twenty minutes later they will look so good even your kitten will want one. But, if you let them cool for a few minutes while you make a quick icing, they will be taken from "so good" to "life changer". 


And they totally are.


Healthy Whole Wheat Cinnamon Rolls (No Yeast Required!)
Yields 12 servings

Ingredients

1 cup all purpose flour
1 cup whole wheat flour 
2 1/2 teaspoons baking powder
1/2 teaspoon salt
5 tablespoons unsweetened applesauce (I used one small container)
1/2 cup skim milk (can substitute almond)
1 teaspoon white vinegar 
1 tablespoon butter, melted
4 tablespoons sugar 
2 teaspoons cinnamon

3 tablespoons powdered sugar 
1-2 tablespoons skim milk
1/4 teaspoon vanilla


Directions

1. Preheat oven to 400 degrees.
2. In a large bowl, combine flours, baking powder, and salt. Add applesauce and combine until shaggy. Chill in refrigerator for ten minutes.
3. Combine 3 tablespoons sugar with cinnamon and mix.
4. Melt butter and let cool.
5. Remove dough from refrigerator and add milk, vinegar, and remaining 1 tablespoon of sugar. Combine until dough comes together into a tacky ball. Remove from bowl and knead, adding extra flour if necessary. 
6. Roll dough into an oval shape, about 1/2 inch in thickness.
7. Brush on melted butter, sprinkle with cinnamon sugar mixture, and roll into a log. With a sharp knife, cut into 12 even sections.
8. Grease a pie pan and place rolled sections cut side down. Space evenly for even cooking.
9. Bake for 20-25 minutes or until puffed and golden brown.
10. While rolls cool, combine powdered sugar, milk, and vanilla. Pour over rolls and enjoy!

Note: These reheat fantastically in the microwave! 
Vegan Option: Substitute Earth Balance for butter and almond milk for skim.

Nutrition:

Calories: 111, Fat: 1g, Carbs: 25g, Protein: 3g

Happy baking!

Amanda

Wednesday, February 2, 2011

healthy & easy popovers!


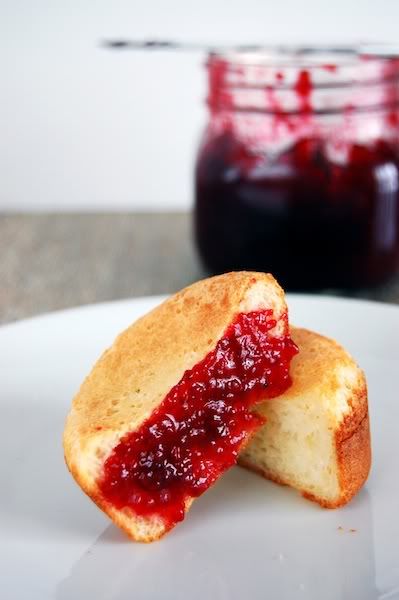
when i was going to grad school in boston my local coffee shop had these popovers people would freak over. seriously. i studied there with regularity and only saw the actual popovers for sale a handful of times, mostly because people would snatch them up as soon as they came out of the oven. as a learned today, that's the absolute best way to eat them.

i was convinced these pillowy babies would be complicated to make and full of butter and guilt, but they were surprisingly easy and this recipe cuts the fat in half!

i'll confess to you, i think there is a learning curve with popovers and mine didn't pop as much as i'd like, but the taste is all there and hopefully you can benefit from my mistakes! plus, how convincing would it be if every recipe i posted was perfect?

i made mine in muffin tins because i hate buying anything that serves only one purpose, unless it's a really good purpose (i.e. ice cream machine!), so i cut the baking time down by five minutes. if you have a popover pan, feel free to tack on an extra five to your baking time.


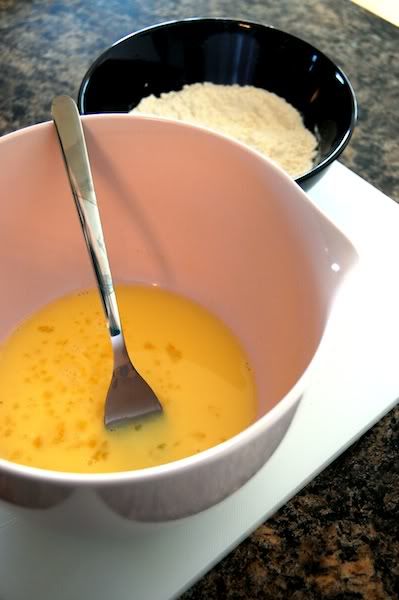
these are all the ingredients! dry ingredients and wet ingredients. the only catch is that the eggs and milk should sit out for about thirty minutes before you mix everything together - it helps the popovers "pop"!

the pans are oil and pre-heated in a hot oven before the batter goes in.


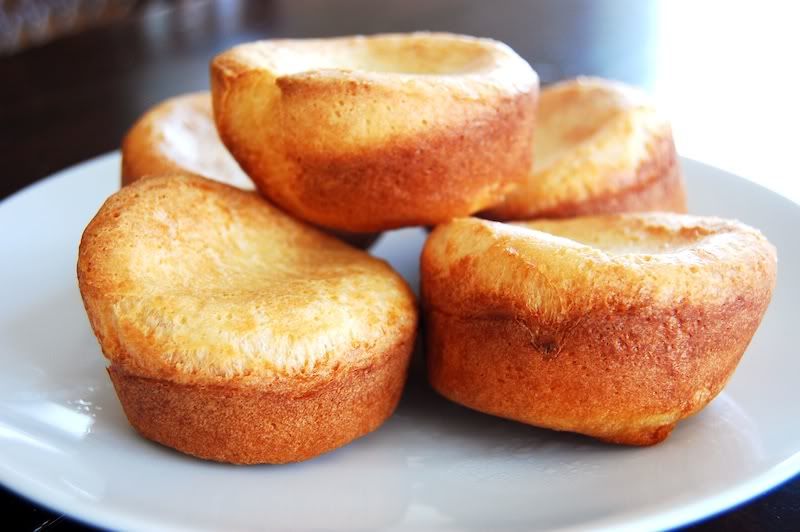
these are just too cute! my edges started popping, but i know they are supposed to get taller. when i make these next, i'm going to bake them at 425°f for the first 10 minutes and then lower it to 375°f degrees for the last 25.


seriously, i might go sneak one of the leftovers right now.

the great thing about this recipe is that you can totally build on it. add herbs, cheese, ice cream, whatever! if you come up with a delicious concoction, let me know!

onto the recipe!

popovers

yields 6
adapted from cooking light

1/2 cup all-purpose flour
1/4 teaspoon salt
1/2 cup low-fat milk
1 large egg
1/2 tablespoon butter, melted
cooking spray

1. combine flour & salt in a small bowl, stirring with a whisk.

2. combine milk & eggs in a medium bowl, stirring with a whisk until well blended. let mixture stand for 30 minutes.

3. while you're waiting for your wet ingredients to come to room temperature, preheat your oven to 425°f and coat a half-dozen muffin tin with cooking spray.

4. after 30 minutes, gradually add flour mixture to egg minutes and combine well with a whisk. stir in melted butter.

5. place pan in the oven for 5 minutes, then divide the batter evenly among prepared and heated pan and bake for 35 minutes - 10 minutes at 425°f and the last 25 minutes at 375°f - or until golden brown and popped!


nutritional information


calories: 90, fat: 3.3g, protein: 3.9g carbs: 12.2g, fiber: 0.4g, cholesterol: 51mg, sodium: 172mg


thanks for reading & happy baking!


amanda

Saturday, January 29, 2011

whole wheat bagels (for under 150 calories!)


i love carbs. i also love breakfast. those who know me know that it is irrelevant what time i actually wake up, breakfast-y things must be my first meal. if they aren't, my whole day is completely thrown. 

when i began to understand nutrition and what i actually should be eating the beautiful, carby, doughy breakfast staple known as the bagel was completely phased out of my life. i could not find a reasonably nutritious bagel anywhere and was resigned to pulling the somewhat depressing scooping-out maneuver whenever i had no choice but to eat one. 

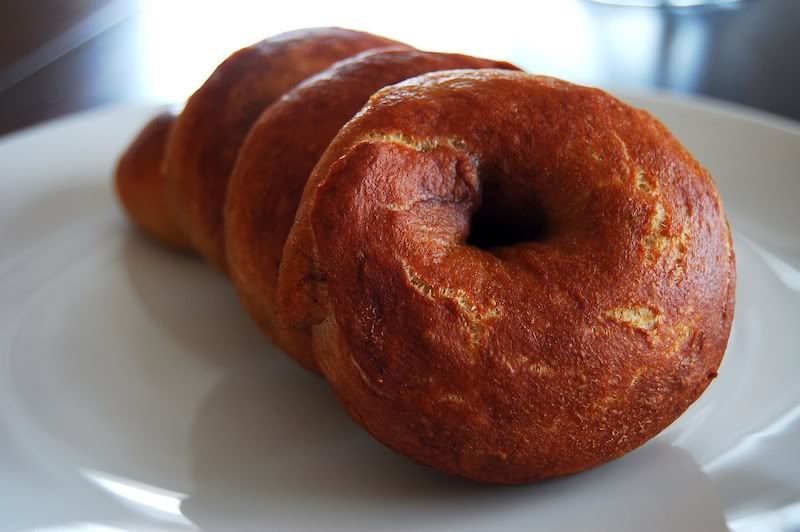
well, my friends, today is one for the history books. i've successfully made delicious and authentic boiled bagels that are less than 150 calories a piece. to give you a comparison, a plain bagel from panera bread has double the calories, fat, cholesterol, with only half the fiber. and that's without cream cheese! how embarrassing.

while interacting with yeast is something i shamefully try to avoid, the idea of being able to make my bagel and eat it too far outweighed my fear. this is a great recipe to try out if you're new to working with yeast, which you always want to mix with warm - not hot! - water to bring it back from the dead (or "activate" it, to be more scientific). i always buy the instant yeast in small packets and keep them in my freezer. 

speaking of freezers, this is also a great recipe to make and then freeze - especially because it makes a baker's dozen. i left a few bagels out for breakfast tomorrow, but cut the rest in half and stuck them in an airtight bag in the freezer. that way, the next time i want a carby treat i can just pull one out and put it in the toaster for around double the time i would a fresh bagel. super easy!


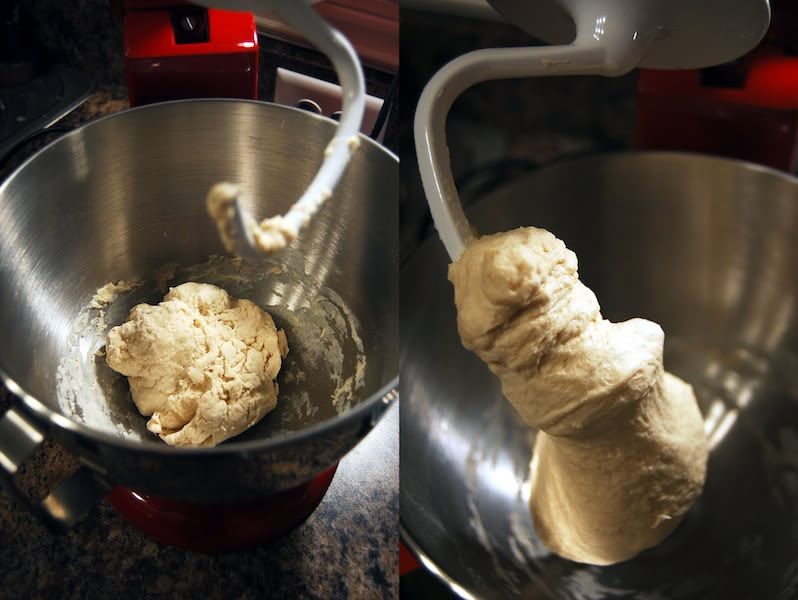
you're going to need a stand mixer and a dough hook for this recipe. you want the dough to end up smooth & not sticky!


at around 7am i was standing in my kitchen with a ball of dough in front of me when i realized i had absolutely no idea how to form bagels. i know this may seem like an important step in researching a recipe, but i was so excited to make bagels in the first place a lot of my common sense flew out the window. i ended up finding this really helpful tutorial that shows you exactly how it's done, starring a man who i now refer to as my bagel sensei. you can check out his multi-step video right here!

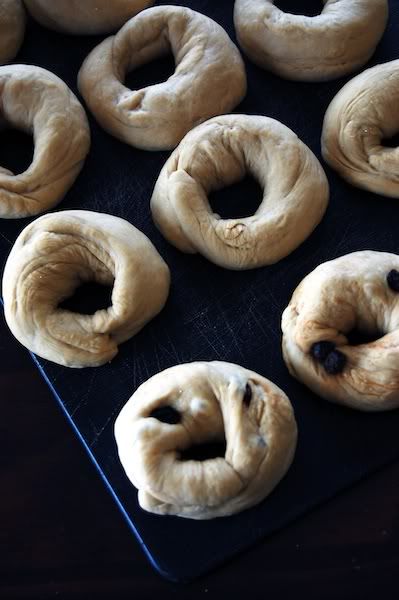
oh, and if you don't have enough reasons to start making these immediately here's another one: they are totally customizable. i made a bunch of cinnamon raisin by sticking ten or so raisins and a splash of cinnamon in the dough before rolling them into circles. the only tip i have is that if you're going to do anything that involves toppings (e.g., poppy seed), wait until they have been boiled, drained and then brushed with a little egg white. this will help things stick while they're baking.


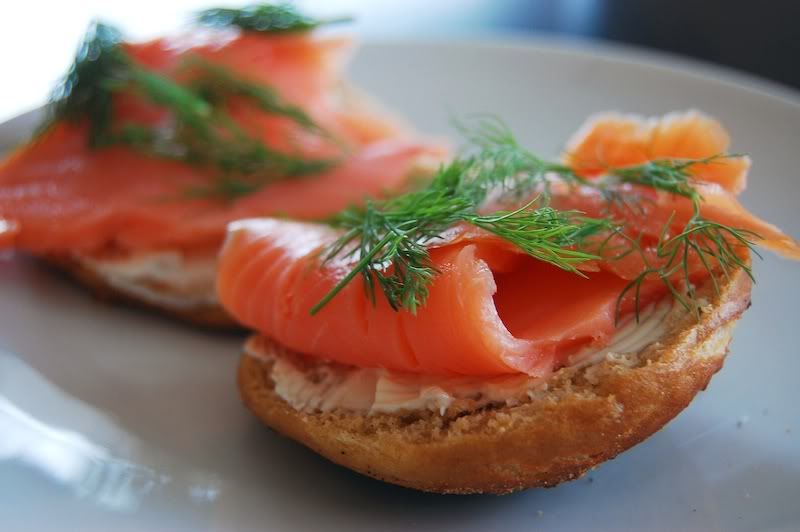
i dragged my other half out of bed this morning and he made himself an everything bagel, which then became this gorgeous lox sandwich. i'm a cinnamon raisin & cream cheese gal myself. you do with your carbs what's right for you.

whole wheat bagels

yields 13 bagels
adapted from beantown baker

pre-dough one:

8 ounces whole wheat flour
¼ teaspoon instant yeast
6 ounces (¾ cup) water

pre-dough two:

2 tablespoons molasses
5 ounces water
8 ounces whole wheat flour
½ teaspoon salt

final dough:

pre-doughs one & two
1 tablespoon water
2 teaspoons yeast
¾ teaspoon salt
7-9 tablespoons flour, plus more if necessary
1 tablespoon baking soda (for boiling)

1. in the bowl of a stand mixer fitted with the dough hook, mix all of the ingredients in pre-dough one on medium-low speed until combined and set aside for five minutes.

2. meanwhile, in a 1-cup measuring cup, stir together the molasses and the five ounces of water in pre-dough two. set aside but stirring occasionally, until the molasses dissolves into the water.

3. return to pre-dough one and knead on low speed for one minute. transfer to a small bowl and cover with plastic wrap or a damp kitchen towel and refrigerate overnight.

4. add the flour and salt for pre-dough two to the empty mixer bowl and with the mixer on low speed, pour in the water/syrup mixture. mix on medium-low just until combined. cover the mixer bowl with plastic wrap or a damp kitchen towel and set aside at room temperature for at least eight hours or overnight.

5. the next day, transfer the refrigerated pre-dough one to room temperature for a couple hours to warm up.

6. when you’re ready to make the final dough, stir together the one tablespoon water and the yeast. In the bowl of a stand mixer fitted with the dough hook, mix both pre-doughs, the water and yeast, and the salt on low speed until combined. while the mixer is running, add in the flour, one tablespoon at a time, until it’s fully absorbed by the dough. then, knead on low speed for 5-6 minutes, adding more flour or water if necessary to form a smooth, firm dough - it shouldn't be sticky.

7. let the dough rise at room temperature until it increases to about 1½ times its original size, about one to two hours.

8. divide the dough into 8-12 pieces, mine came out to around 65g each. shape each piece into a smooth ball, then roll each piece into a rope about ¾-inch thick. bring the ends of the rope together and gently roll them on a flat surface to seal. let the dough rest for about twenty minutes.

9. preheat the oven to 500 degrees and line a baking sheet with parchment paper or a silicone mat. bring at least three inches of water to a boil in a large pot over high heat. add 1 tablespoon baking soda and reduce the heat to medium. gently drop 2-4 bagels (as many as will fit without crowding) into the water, boiling for one minute on each side. place the boiled bagels on a wire cooling rack to drip-dry slightly, about three to four minutes.

10.  place bagels on lined baking sheet and transfer the sheet to the oven, reduce the oven temperature to 450 degrees, and bake until the bagels are browned and feel hard, about 13 minutes for small bagels. (note: the bagels will soften as they cool.)

11. cool bagels on wire rack for 15-20 minutes before enjoying!


nutritional information:


calories: 144, fat: 0.5g, sodium: 226g, carbs; 31g, fiber: 4.5g, sugars: 2g, protein: 5.5g.

thank you for reading & happy baking!

amanda

ps: i know this recipe is long & a bit complicated, so if you have any questions please don't hesitate to ask!