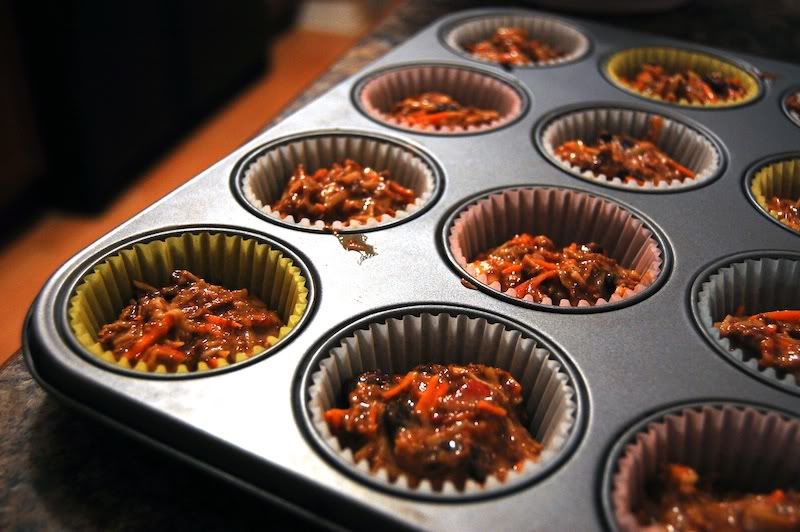
Showing posts with label breakfast. Show all posts

Sunday, March 2, 2014

morning cookies (vegan and gluten free!)


I know, I know. "Morning cookie" seems like an oxymoron, or at least a poor choice, but I promise it isn't. This recipe was born out of my need for a healthy, portable, no-refrigeration-needed snack that I could have in the middle of the morning to tide me over until lunch. I had been buying granola bars for years to help with this issue, until I got fed up with the high prices and high sugar (this recipe has none!) and decided to just make them myself. 
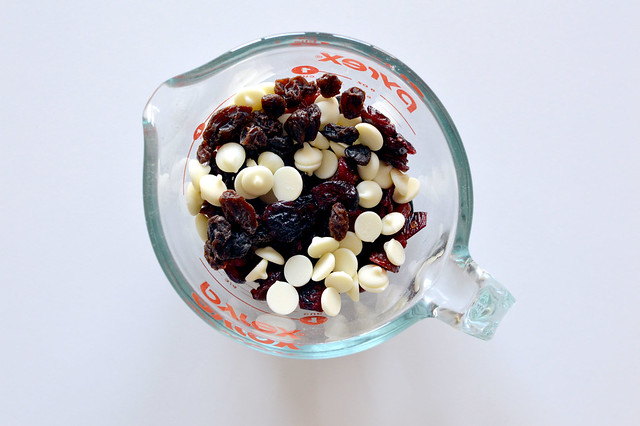

Another fantastic thing about these cookies is that they help me use up the awkward few tablespoons of mix-ins that are always left over from other recipes. 1/4 cup of nuts from this, a few tablespoons of raisins from that, the bottom of a bag from that other thing - you know how it goes! While you can absolutely use specific ingredients for mix-ins, I like to just use whatever mix of dried fruit, nuts, and chips I have on hand. 
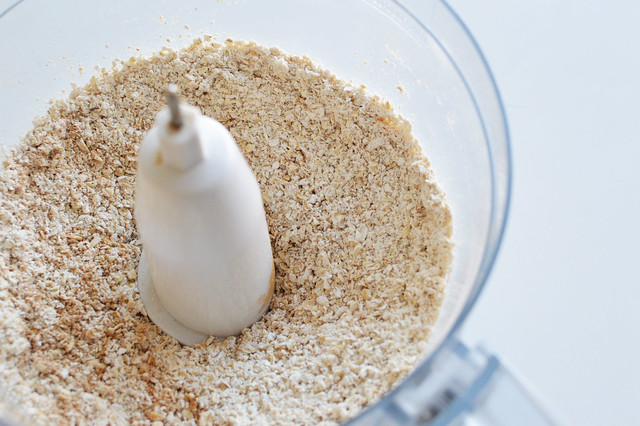

As if this recipe needed a third bonus, it's all made in the food processor. I will always be appreciative of a single dirty bowl. If you don't have any quick oats on hand, you can put old fashioned in the processor first and give it a few good pulses. Ta da! The quick oats have been made.
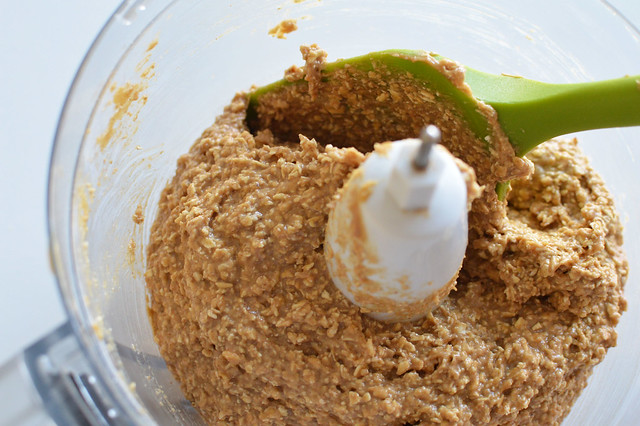

After adding in a banana, nut butter (I use peanut, but you can use almost anything!), applesauce, maple syrup, and a few spices, you have a fantastic cookie base that is delicious on its own. But, we all know we're not going to stop there. Time to get creative with the mix-ins!
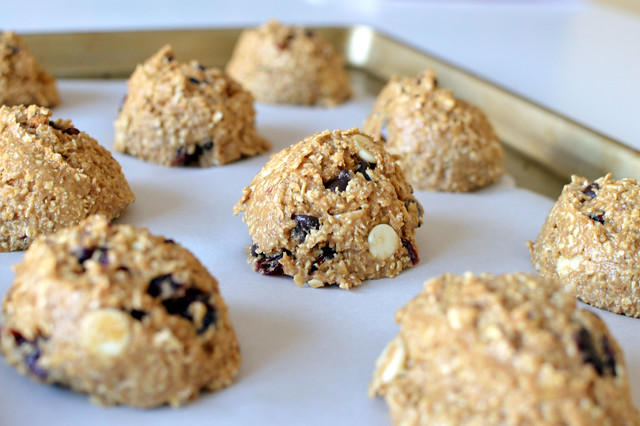

I use my largest cookie scoop, which holds a scant 1/4 cup, for above-average size cookies. My batches usually yield around 9, more than enough for the week, but you can feel free to make yours bigger or smaller - just remember to adjust your baking time!


These guys don't like to spread on their own, so I like to aid the process by pressing them down with the bottom of a drinking glass about halfway through the baking process. It's also important to let them cool completely before trying to remove them from the pan, since they're a little more baked-oatmeal and a little less regular-cookie when hot. Don't worry, after 10-15 minutes they are ready to be bagged or snacked on for the week ahead!


Morning Cookies (Vegan, Gluten Free, No Refined Sugar)
Adapted from Joy the Baker 
Yields 9

Ingredients

2 cups quick oats
1/2 teaspoon salt
1/2 teaspoon cinnamon
1/2 teaspoon nutmeg
3/4 cup peanut butter (or the nut butter of your choice)
1/4 cup maple syrup (I used sugar-free, but regular or honey will also work)
1/2 cup mashed banana
1/2 tsp vanilla
1-1 1/2 cups mix-ins

Directions

1. Preheat oven to 325 degrees.
2. Combine all ingredients except for mix-ins in food processor until combined, about 2-3 minutes, scraping the sides of the bowl every minute. (Note: If using old fashioned oats, add them first, pulse 5-6 times to break them down, then all remaining ingredients). 
3. Stir in mix-ins by hand until well combined.
4. Drop 1/4 inch scoops onto a parchment-lined baking sheet.
5. Bake for 15-16 minutes, edges will be golden brown, pressing cookies with a glass about halfway through. Let cool. 

Nutrition: 

Calories: 265, Fat: 13g, Carbs: 32g, Fiber: 4.31g, Sugars: 13.8g, Protein: 8.3g

Happy baking!

Amanda

Monday, February 24, 2014

low fat whole wheat cinnamon rolls (no yeast required!)


I like to think I have pretty good self control. I don't buy shoes just because they're on sale. I make myself coffee at home every day instead of splurging at Starbucks. I avoid eye contact with the Reese's peanut butter cups as I'm checking out of the grocery store. 

But, we all have our weaknesses, and when it comes to the smell of warm, pillowy, cinnamon sugar goodness, I'm a goner. (Seriously, when I'm alone in an airport, I feel like I have to strategically plot my course to avoid any and all Cinnabons.)

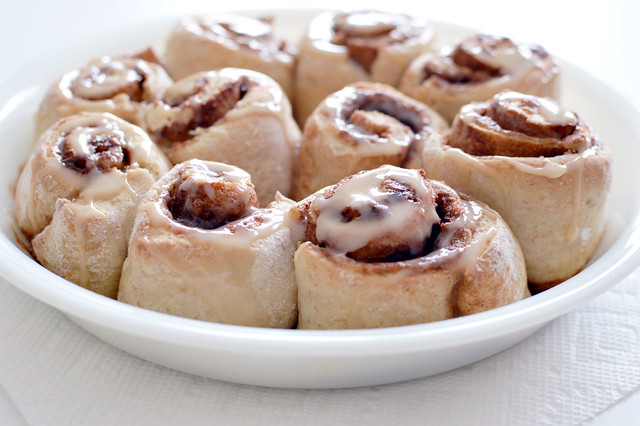
In an effort to satisfy these cravings, and not end up missing a flight just to be found under a pile of empty Cinnabon containers, I had to find an easy, healthy, and quick recipe for cinnamon rolls that I could feel good about. These babies don't need any yeast, take about thirty minutes to whip up, and reheat like a dream. Basically, perfection. My self control thanks me. 


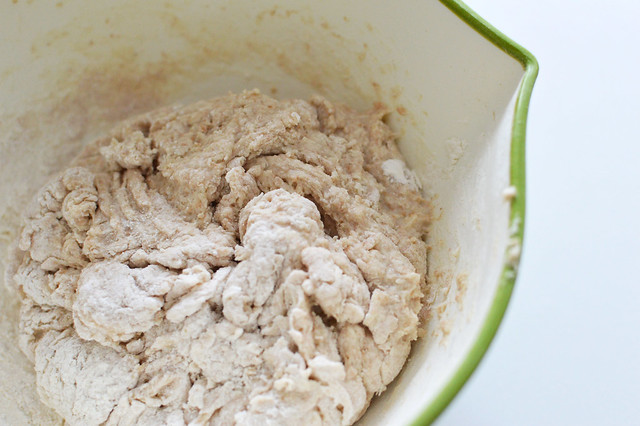
I will admit, things start out a little weird, but trust me on this one. Applesauce is cut into the flour mixture to get the dough started. You can use a pastry cutter for this, but I prefer to use two forks - the last thing I need is another kitchen gadget! Then, the almost-dough gets chilled for ten minutes.


This is a very handy time to get your cinnamon-sugar mixture together and get your butter melted for the filling. (Wouldn't be a cinnamon roll without it!)


With the addition of milk and vinegar, the dough comes together easily. I did 80% of the work in the bowl and finished the kneading off with my hands on the counter. Feel free to add a little more flour if your dough is too tacky. 


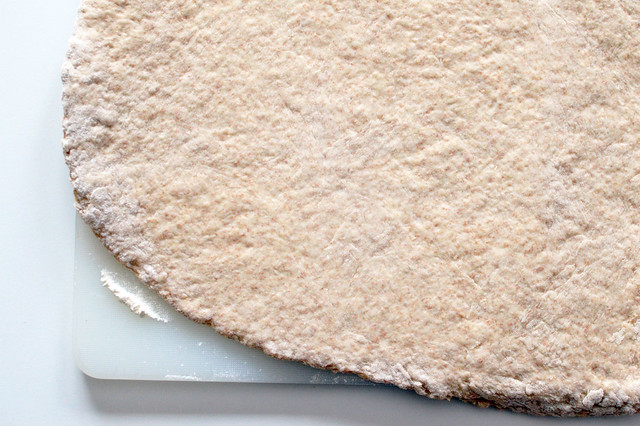
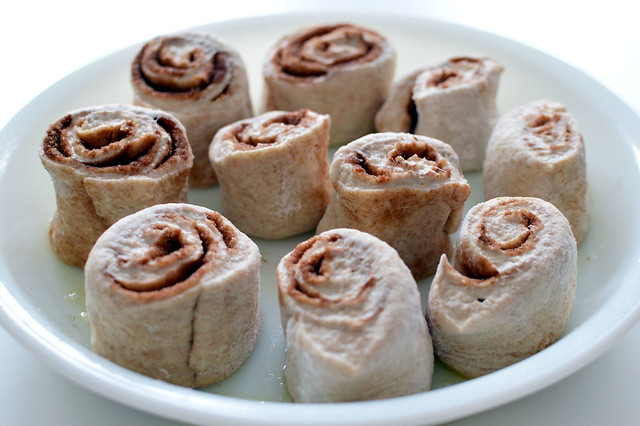
Once you get your dough rolled out to about a 1/2 inch thick, things started to get a little messy. At this point, you want to brush on the melted butter, sprinkle the cinnamon sugar mixture evenly, and roll the dough into a log. Once it's rolled up, you can even out any bulges - I find my middle to always get a little thicker than the rest. Then, slice your log into twelve even sections.


Okay, okay. You caught me. I totally said twelve, but only have ten. It was early and I was feeling generous! Either way, you want to make sure you space your rolls out so they have room to grow and bake all the way through.


When they come out of the oven twenty minutes later they will look so good even your kitten will want one. But, if you let them cool for a few minutes while you make a quick icing, they will be taken from "so good" to "life changer". 


And they totally are.


Healthy Whole Wheat Cinnamon Rolls (No Yeast Required!)
Yields 12 servings

Ingredients

1 cup all purpose flour
1 cup whole wheat flour 
2 1/2 teaspoons baking powder
1/2 teaspoon salt
5 tablespoons unsweetened applesauce (I used one small container)
1/2 cup skim milk (can substitute almond)
1 teaspoon white vinegar 
1 tablespoon butter, melted
4 tablespoons sugar 
2 teaspoons cinnamon

3 tablespoons powdered sugar 
1-2 tablespoons skim milk
1/4 teaspoon vanilla


Directions

1. Preheat oven to 400 degrees.
2. In a large bowl, combine flours, baking powder, and salt. Add applesauce and combine until shaggy. Chill in refrigerator for ten minutes.
3. Combine 3 tablespoons sugar with cinnamon and mix.
4. Melt butter and let cool.
5. Remove dough from refrigerator and add milk, vinegar, and remaining 1 tablespoon of sugar. Combine until dough comes together into a tacky ball. Remove from bowl and knead, adding extra flour if necessary. 
6. Roll dough into an oval shape, about 1/2 inch in thickness.
7. Brush on melted butter, sprinkle with cinnamon sugar mixture, and roll into a log. With a sharp knife, cut into 12 even sections.
8. Grease a pie pan and place rolled sections cut side down. Space evenly for even cooking.
9. Bake for 20-25 minutes or until puffed and golden brown.
10. While rolls cool, combine powdered sugar, milk, and vanilla. Pour over rolls and enjoy!

Note: These reheat fantastically in the microwave! 
Vegan Option: Substitute Earth Balance for butter and almond milk for skim.

Nutrition:

Calories: 111, Fat: 1g, Carbs: 25g, Protein: 3g

Happy baking!

Amanda

Saturday, February 15, 2014

healthy classic banana bread


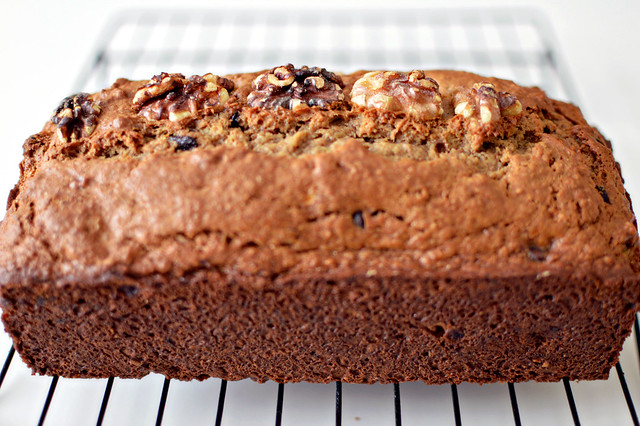
I wouldn't say that I use baked goods to bribe people, but I do think there is a certain incentive to agree to a favor when there are, let's say, cookies involved. That's what happened a few weeks ago when I had the opportunity to photograph the National Cathedral and hoped to borrow some extra equipment from a friend. I generally shoot with a light body and a short lens, but I wanted a few back up options, knowing that I probably wouldn't get the chance to shoot from the rafters of the building again. In return, I promised a loaf of banana bread.

To be honest, my Mom is kind the banana bread guru in my life and I rarely make it myself. Nevertheless, I decided that having a healthy version in my arsenal wouldn't hurt, especially given how comforting a warm slice can be in the dead of winter when I'm dreaming of picking fresh fruit and dressing in less than three layers.

I took advantage of the snow day (fellow D.C.-ers, are you dug out yet?) and the super ripe bananas I had been waiting on to test out this lightened-up version of a classic quick bread. Embarrassingly, I doubled the butter needed to get this recipe started and decided it was a sign to just make a double batch! I ended up with a full loaf and twelve muffins, which means I've got snacks for the week. I believe the term "happy accident" would be appropriate here.


Quick tip: I keep my baking bananas in a brown paper bag with the top folded over. Science tells me that helps them ripen faster than just sitting on your counter due to gases being emitted and the concentration of said gases and other concepts that I just don't have room in my brain for. All I know is, it works.


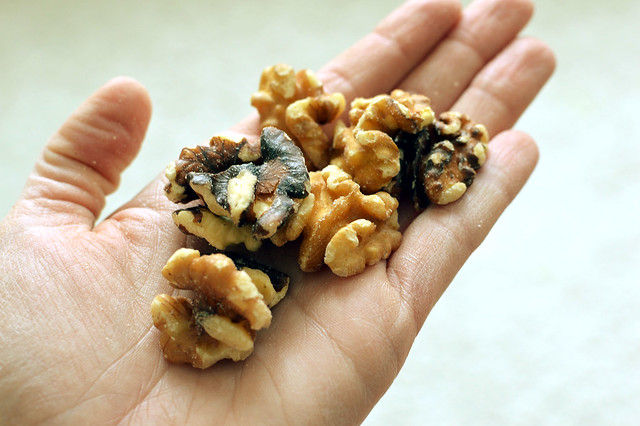
Banana bread is great on its own, but walnut and chocolate chips really take it to the next level. I pulled out some unbroken walnuts to decorate the top and give it that professional "did YOU make this?" quality.


Once I had all my dry ingredients ready to go, I added the walnuts and chocolate and gave it a good toss in the flour mixture. I find the coating helps suspend them in the batter and helps avoid having a bottom layer consisting of chocolate and nuts. 


Also, since I live on the wild side, while most recipes call for you to really mash the bananas well, I like to be a little more gentle to I get pieces of fruit throughout the bread. (Okay, maybe I just really like mix-ins! You never want to share a pint of ice cream with me, unless plain vanilla is your thing.)


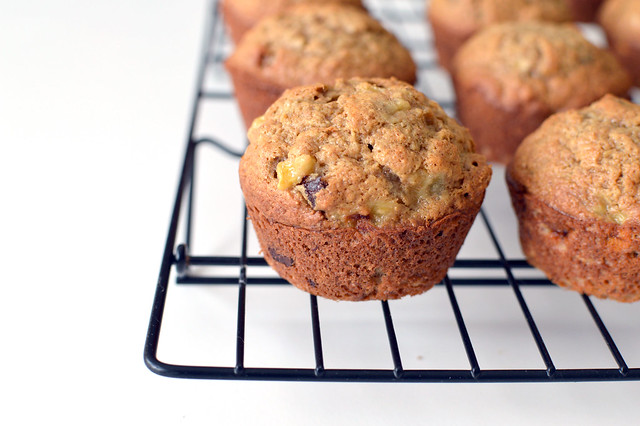
Since the loaf was a gift, you'll have to trust that the muffins adequately represent the perfect texture of this bread. (For those of you going the muffin route, they only take about 14-17 minutes in the oven!) 


The best part about banana bread? It really does get better over time. I find that it's best the second or third day, which makes it a great bake-ahead project.

Healthy Classic Banana Bread
Adapted from Cooking Light
Yields 14 servings

Ingredients:

1 cup whole wheat flour
1 cup all-purpose flour
3/4 teaspoon baking soda
1 teaspoon cinnamon
1/2 teaspoon salt
1/2 cup brown sugar
1/4 cup white sugar
1/4 cup butter, softened
2 large eggs
1 1/2 mashed ripe bananas (about 2 bananas)
1/3 cup 0% plain Greek yogurt (feel free to use honey, banana, or vanilla flavors)
1 teaspoon vanilla extract

Optional: 1/2 to 3/4 cup mix-ins

Directions:

1. Preheat oven to 350 degrees.
2. Cream butter and sugars together on medium speed, about one minute. Add eggs, one at a time, beating well after each addition.
3. Add banana, yogurt, and vanilla, and beat on medium speed until blended.
4. Sift or whisk together flours, baking soda, cinnamon, and salt.
5. Add dry mixture to wet mixture and combine on low until just blended. Do not over-mix! (I avoid this by letting my stand mixer do about 50% of the work, then mixing it the rest of the way by hand. Over-mixing leads to tough breads, which no one likes!).
6. Spoon batter into a loaf pan that has been greased with cooking spray and bake for 40-45 minutes, or until a knife speared through the center comes out clean.
7. Cool on wire rack for ten minutes, remove from pan, and let cool completely. 

Nutritional Information:

Calories: 165, Fat: 3.85g, Cholesterol: 39mg, Carbs: 28g, Fiber: 2g, Protein: 4.5g

(For comparison, Starbucks' Banana Bread has nearly 500 calories a slice!)

Sunday, March 20, 2011

vegan almond-flax coffee cake


last week at work one of my coworkers snuck into my office and let me know that, no pressure, he wouldn't be upset if i whipped up some vegan goodies. well, with me it's ask and you shall receive, so i decided to figure out a coffee cake recipe that would be a crowd pleaser with vegans & non-vegans alike.


i'm generally a bargain hunter and rarely very brand loyal when it comes to staples like sugar or butter, but when it comes to vegan baking earth balance non-dairy margarine is really the best of the best. it creams and whips beautifully, which has been a problem with off-brands, and it's awesome for icings. the only other thing that i think is worth splurging on are extracts. i find that mccormick and generic brands leave an artificial aftertaste that is a little off-putting to me. moral of the story: be cheap when you need to be, but splurge on the good stuff when you can!


i used an 8" round for this little project but found that the pan was a little over-filled, so i would actually recommend a 9". if you have a springform grab that, it will definitely make removal much easier. also, don't forget to flour your pan!


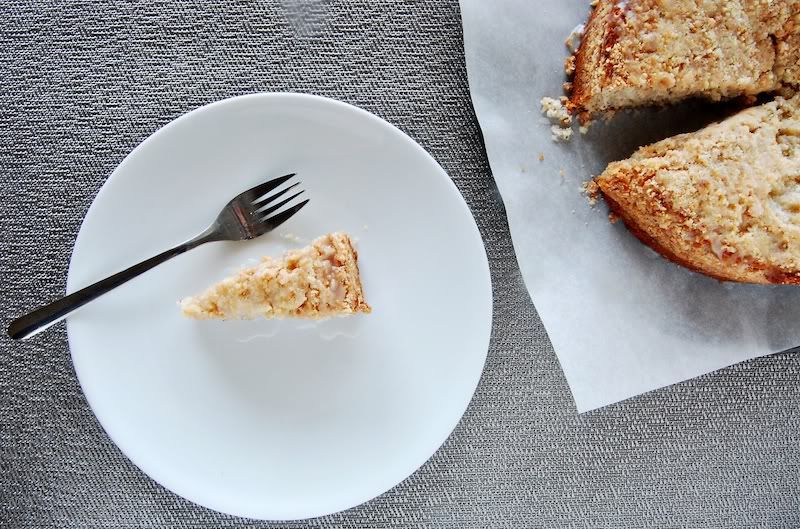
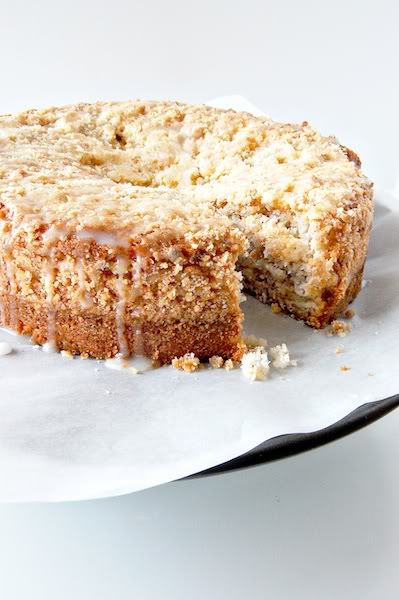
the delicate almond flavor in this cake is well-balanced by the hearty and nutty flax meal. it isn't overly sweet, which is perfect for a cake served in the morning hours, but the crumble and drizzle do give it a little crunch and sweetness that really helps bring it all together and make it treat-worthy. 


vegan almond-flax coffee cake

yields 16 servings

ingredients

for the cake:

1/2 cup almond milk
1 tablespoon vinegar
3/4 cup vegan margarine 
1 1/2 cups granulated sugar
1 1/2 teaspoons almond extract
3 tablespoons flax meal mixed with 6 tablespoons warm water
1/2 teaspoons salt
1 teaspoon baking powder
3/4 cup cake flour
1 1/4 cup all-purpose flour

for the crumble:

1/4 cup almond meal
1/4 cup granulated sugar
3 tablespoons all-purpose flour
1 tablespoon vegan margarine, melted

for the icing:

1/2 cup confectioner's sugar
1 teaspoon almond extract
1/2 - 1 tablespoon almond milk


1. combine almond milk and vinegar in a small bowl & let curdle. combine flax meal and water in another small bowl and let soak.


2. preheat oven to 350 degrees fahrenheit.

3. lightly grease and flour a 9" round or square pan.

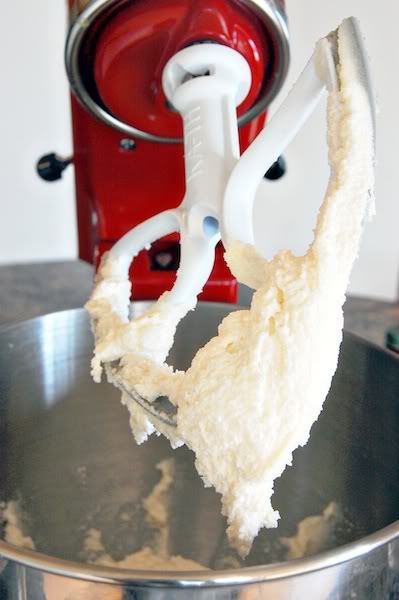
4. in the bowl of a stand mixer, cream together margarine, sugar, and almond extract until light and fluffy. add flax meal paste and beat until smooth.

5. in a separate bowl whisk together salt, baking powder, and flours. 

6. alternate adding flour mixture and vinegar mixture to mixer bowl until well combined. pour batter in to prepared pan and knock on counter several times to remove any bubbles.

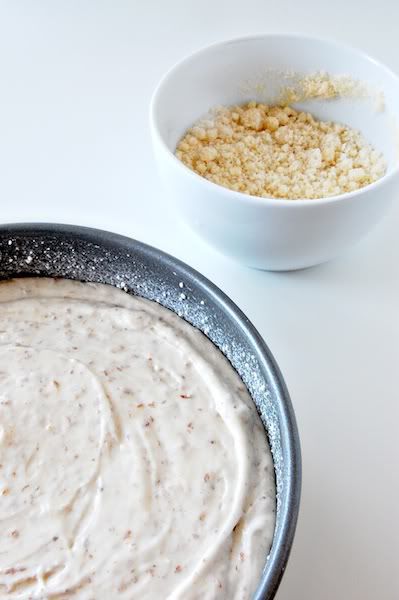
7. melt margarine in microwave safe bowl and add remaining ingredients. cut & mix with fork until there are even pebble-sized crumbles throughout.

8. spread crumbles over cake batter and pat down lightly. 

9. bake in preheated oven for 45-50 minutes or until knife inserted into center comes out clean. let cool completely.

10. once cake is cool, stir together all icing ingredients and drizzle over cake. let set and dry.


nutritional information

calories: 258, fat: 10.25g, sodium: 184 mg, carbs: 39.5g, fiber: 1g, sugars: 25, protein: 2.34g.


thanks for reading & happy baking!

amanda
Wednesday, February 2, 2011

healthy & easy popovers!


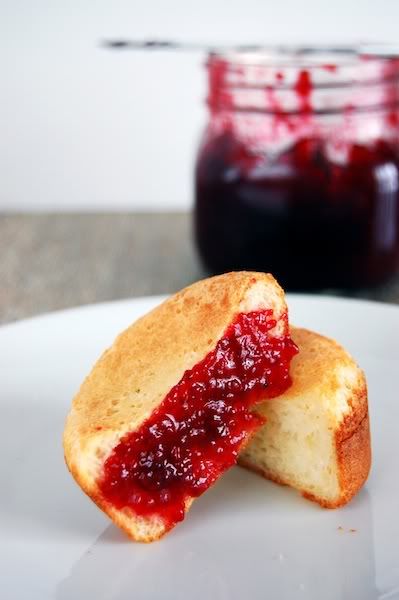
when i was going to grad school in boston my local coffee shop had these popovers people would freak over. seriously. i studied there with regularity and only saw the actual popovers for sale a handful of times, mostly because people would snatch them up as soon as they came out of the oven. as a learned today, that's the absolute best way to eat them.

i was convinced these pillowy babies would be complicated to make and full of butter and guilt, but they were surprisingly easy and this recipe cuts the fat in half!

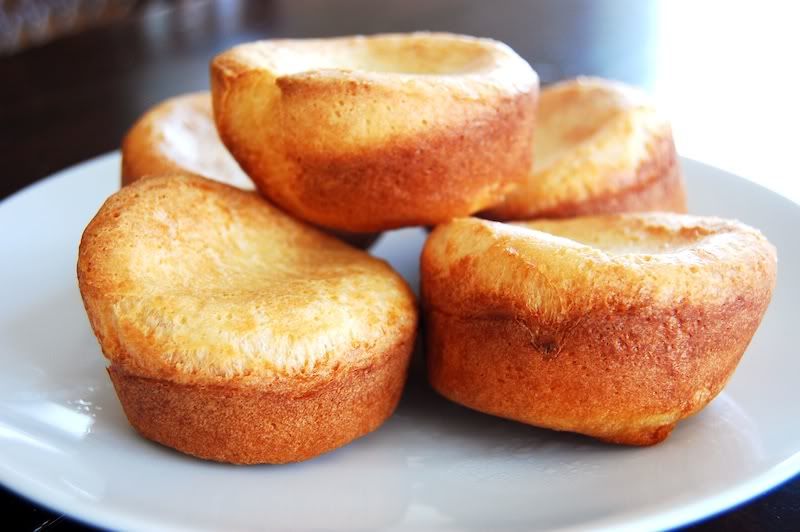
i'll confess to you, i think there is a learning curve with popovers and mine didn't pop as much as i'd like, but the taste is all there and hopefully you can benefit from my mistakes! plus, how convincing would it be if every recipe i posted was perfect?

i made mine in muffin tins because i hate buying anything that serves only one purpose, unless it's a really good purpose (i.e. ice cream machine!), so i cut the baking time down by five minutes. if you have a popover pan, feel free to tack on an extra five to your baking time.


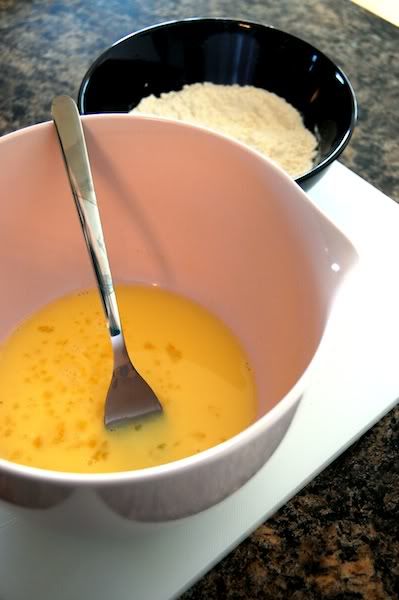
these are all the ingredients! dry ingredients and wet ingredients. the only catch is that the eggs and milk should sit out for about thirty minutes before you mix everything together - it helps the popovers "pop"!

the pans are oil and pre-heated in a hot oven before the batter goes in.


these are just too cute! my edges started popping, but i know they are supposed to get taller. when i make these next, i'm going to bake them at 425°f for the first 10 minutes and then lower it to 375°f degrees for the last 25.


seriously, i might go sneak one of the leftovers right now.

the great thing about this recipe is that you can totally build on it. add herbs, cheese, ice cream, whatever! if you come up with a delicious concoction, let me know!

onto the recipe!

popovers

yields 6
adapted from cooking light

1/2 cup all-purpose flour
1/4 teaspoon salt
1/2 cup low-fat milk
1 large egg
1/2 tablespoon butter, melted
cooking spray

1. combine flour & salt in a small bowl, stirring with a whisk.

2. combine milk & eggs in a medium bowl, stirring with a whisk until well blended. let mixture stand for 30 minutes.

3. while you're waiting for your wet ingredients to come to room temperature, preheat your oven to 425°f and coat a half-dozen muffin tin with cooking spray.

4. after 30 minutes, gradually add flour mixture to egg minutes and combine well with a whisk. stir in melted butter.

5. place pan in the oven for 5 minutes, then divide the batter evenly among prepared and heated pan and bake for 35 minutes - 10 minutes at 425°f and the last 25 minutes at 375°f - or until golden brown and popped!


nutritional information


calories: 90, fat: 3.3g, protein: 3.9g carbs: 12.2g, fiber: 0.4g, cholesterol: 51mg, sodium: 172mg


thanks for reading & happy baking!


amanda

Saturday, January 29, 2011

whole wheat bagels (for under 150 calories!)


i love carbs. i also love breakfast. those who know me know that it is irrelevant what time i actually wake up, breakfast-y things must be my first meal. if they aren't, my whole day is completely thrown. 

when i began to understand nutrition and what i actually should be eating the beautiful, carby, doughy breakfast staple known as the bagel was completely phased out of my life. i could not find a reasonably nutritious bagel anywhere and was resigned to pulling the somewhat depressing scooping-out maneuver whenever i had no choice but to eat one. 

well, my friends, today is one for the history books. i've successfully made delicious and authentic boiled bagels that are less than 150 calories a piece. to give you a comparison, a plain bagel from panera bread has double the calories, fat, cholesterol, with only half the fiber. and that's without cream cheese! how embarrassing.

while interacting with yeast is something i shamefully try to avoid, the idea of being able to make my bagel and eat it too far outweighed my fear. this is a great recipe to try out if you're new to working with yeast, which you always want to mix with warm - not hot! - water to bring it back from the dead (or "activate" it, to be more scientific). i always buy the instant yeast in small packets and keep them in my freezer. 

speaking of freezers, this is also a great recipe to make and then freeze - especially because it makes a baker's dozen. i left a few bagels out for breakfast tomorrow, but cut the rest in half and stuck them in an airtight bag in the freezer. that way, the next time i want a carby treat i can just pull one out and put it in the toaster for around double the time i would a fresh bagel. super easy!


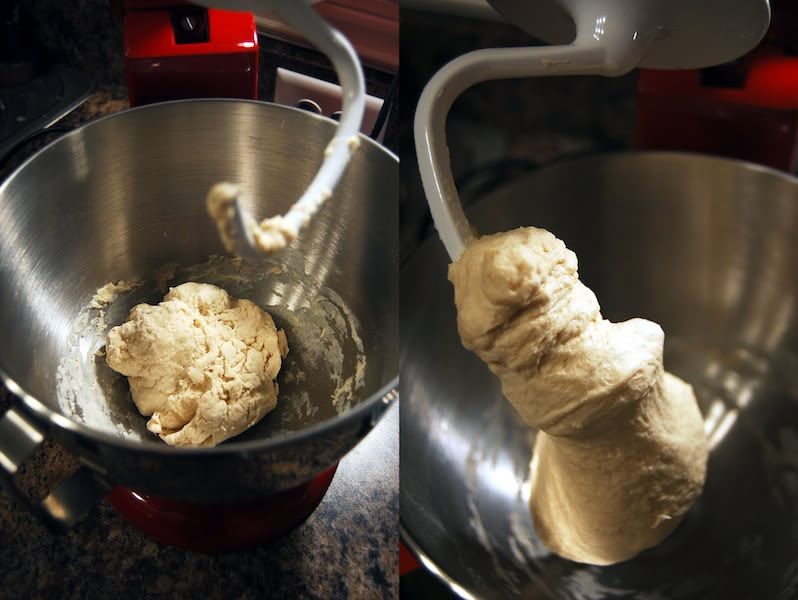
you're going to need a stand mixer and a dough hook for this recipe. you want the dough to end up smooth & not sticky!


at around 7am i was standing in my kitchen with a ball of dough in front of me when i realized i had absolutely no idea how to form bagels. i know this may seem like an important step in researching a recipe, but i was so excited to make bagels in the first place a lot of my common sense flew out the window. i ended up finding this really helpful tutorial that shows you exactly how it's done, starring a man who i now refer to as my bagel sensei. you can check out his multi-step video right here!

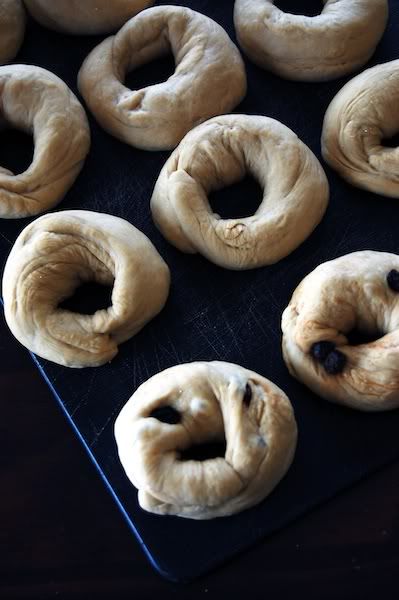
oh, and if you don't have enough reasons to start making these immediately here's another one: they are totally customizable. i made a bunch of cinnamon raisin by sticking ten or so raisins and a splash of cinnamon in the dough before rolling them into circles. the only tip i have is that if you're going to do anything that involves toppings (e.g., poppy seed), wait until they have been boiled, drained and then brushed with a little egg white. this will help things stick while they're baking.


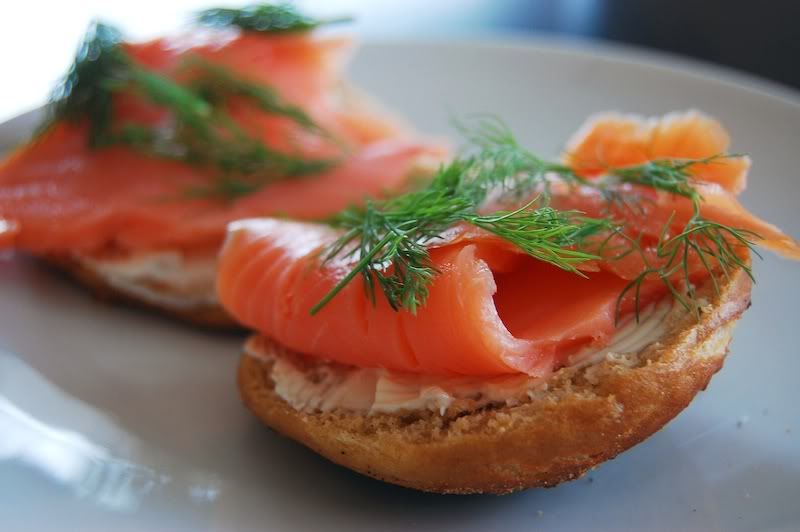
i dragged my other half out of bed this morning and he made himself an everything bagel, which then became this gorgeous lox sandwich. i'm a cinnamon raisin & cream cheese gal myself. you do with your carbs what's right for you.

whole wheat bagels

yields 13 bagels
adapted from beantown baker

pre-dough one:

8 ounces whole wheat flour
¼ teaspoon instant yeast
6 ounces (¾ cup) water

pre-dough two:

2 tablespoons molasses
5 ounces water
8 ounces whole wheat flour
½ teaspoon salt

final dough:

pre-doughs one & two
1 tablespoon water
2 teaspoons yeast
¾ teaspoon salt
7-9 tablespoons flour, plus more if necessary
1 tablespoon baking soda (for boiling)

1. in the bowl of a stand mixer fitted with the dough hook, mix all of the ingredients in pre-dough one on medium-low speed until combined and set aside for five minutes.

2. meanwhile, in a 1-cup measuring cup, stir together the molasses and the five ounces of water in pre-dough two. set aside but stirring occasionally, until the molasses dissolves into the water.

3. return to pre-dough one and knead on low speed for one minute. transfer to a small bowl and cover with plastic wrap or a damp kitchen towel and refrigerate overnight.

4. add the flour and salt for pre-dough two to the empty mixer bowl and with the mixer on low speed, pour in the water/syrup mixture. mix on medium-low just until combined. cover the mixer bowl with plastic wrap or a damp kitchen towel and set aside at room temperature for at least eight hours or overnight.

5. the next day, transfer the refrigerated pre-dough one to room temperature for a couple hours to warm up.

6. when you’re ready to make the final dough, stir together the one tablespoon water and the yeast. In the bowl of a stand mixer fitted with the dough hook, mix both pre-doughs, the water and yeast, and the salt on low speed until combined. while the mixer is running, add in the flour, one tablespoon at a time, until it’s fully absorbed by the dough. then, knead on low speed for 5-6 minutes, adding more flour or water if necessary to form a smooth, firm dough - it shouldn't be sticky.

7. let the dough rise at room temperature until it increases to about 1½ times its original size, about one to two hours.

8. divide the dough into 8-12 pieces, mine came out to around 65g each. shape each piece into a smooth ball, then roll each piece into a rope about ¾-inch thick. bring the ends of the rope together and gently roll them on a flat surface to seal. let the dough rest for about twenty minutes.

9. preheat the oven to 500 degrees and line a baking sheet with parchment paper or a silicone mat. bring at least three inches of water to a boil in a large pot over high heat. add 1 tablespoon baking soda and reduce the heat to medium. gently drop 2-4 bagels (as many as will fit without crowding) into the water, boiling for one minute on each side. place the boiled bagels on a wire cooling rack to drip-dry slightly, about three to four minutes.

10.  place bagels on lined baking sheet and transfer the sheet to the oven, reduce the oven temperature to 450 degrees, and bake until the bagels are browned and feel hard, about 13 minutes for small bagels. (note: the bagels will soften as they cool.)

11. cool bagels on wire rack for 15-20 minutes before enjoying!


nutritional information:


calories: 144, fat: 0.5g, sodium: 226g, carbs; 31g, fiber: 4.5g, sugars: 2g, protein: 5.5g.

thank you for reading & happy baking!

amanda

ps: i know this recipe is long & a bit complicated, so if you have any questions please don't hesitate to ask!

Saturday, January 22, 2011

bran flax morning muffins

i had been curious about flax seeds for a while, mostly because you can hide them in almost every baked good to give them some fiber & omega 3, but was always a little intimidated by something that seemed so, well, healthy.

i decided to splurge today and picked up some bob's red mill flaxseed meal from trader joe's for a few bucks. i spied a recipe on the side of the bag while stashing it in my fridge and decided to try it as a good pre-workout snack or quick morning breakfast fix.

yup, i'm starting this blog off on an unexpectedly nutritious foot, but these little muffins are easy & completely customizable.


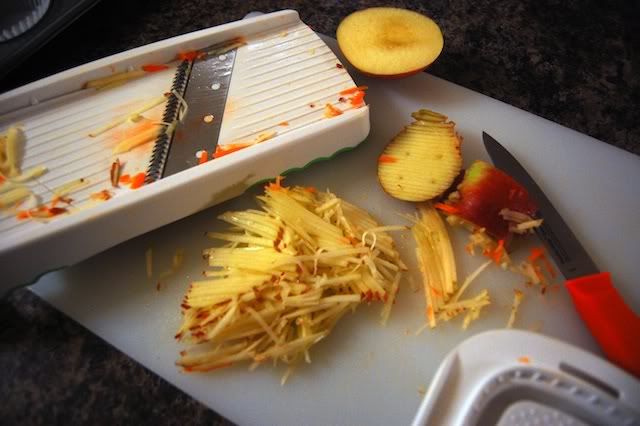
i was thrilled to be able to break out my mandolin, which is basically just a fancy food slicer, to make even apple & carrot matchsticks for these babies. don't have a mandolin? just chop up your ingredients as thin or as coarsely as you like! make it your own!


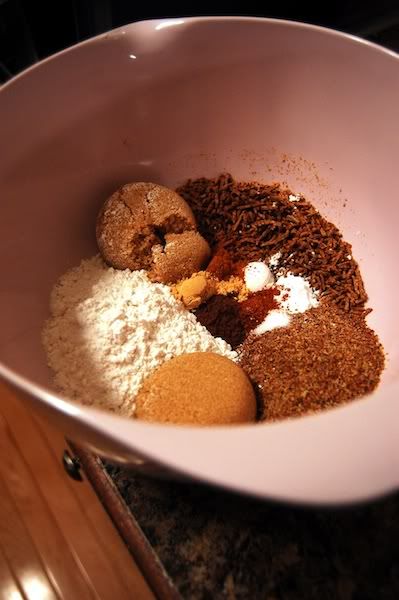
i ended up editing the original recipe by adding and upping the spices, as well as using cake flour to make sure the muffins were nice and soft.


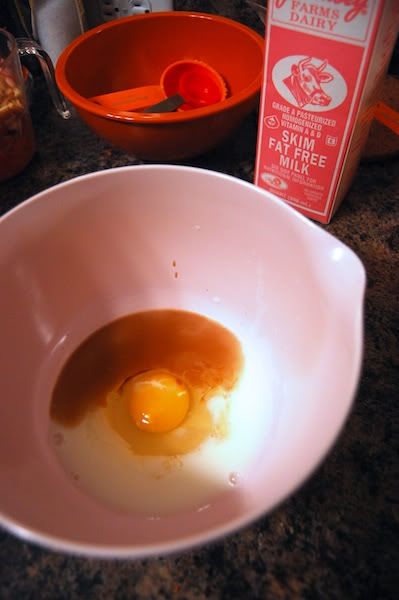
the wet ingredients were super simple, and i got to use the vanilla i brought back from mexico!


i halved the recipe and got a full dozen - three more than the recipe yielded! having leftovers is a serious theme in my baking life. 


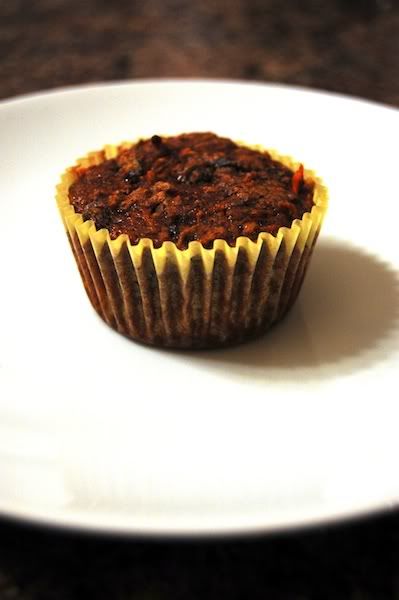
i know they look healthy, but they taste so great! the next time i make these bad boys i might add some chopped walnuts on top for some crunch. either way, good & good for you! also, i have a feeling that these might be easily adaptable into a vegan recipe (almond/soy milk instead of skim & veggie oil/banana for egg?), a food genre i'm more and more interested in.


bran flax morning muffins

yields 24 muffins
adapted from bob's red mill bran flax muffins

1 1/2 cups whole wheat cake flour
3/4 cups flaxseed meal
2/4 cup oat bran cereal 
1 cup light brown sugar
2 tsp baking soda
1 tsp baking powder
1/2 tsp salt
2 tsp cinnamon
1 tsp ginger
1 tsp allspice
1 tsp nutmeg
1 1/2 cups finely shredded carrots
2 shredded apples
1/2 cup raisins
1 cup chopped nuts (optional)
3/4 cups milk
2 beaten eggs
1 tsp vanilla

mix together flaxseed meal, oat bran, brown sugar, baking soda, baking powder, salt, and spices in a large bowl. stir in carrots, apples, raisins, and nuts (if desired). combine milk, beaten eggs, and vanilla in small bowl. pour liquid ingredients into dry ingredients and stir until ingredients are moistened. note: do not over mix, this will cause tough muffins.

fill muffin cups 3/4 full and bake at 350 degrees f for 15-20 minutes. i did seventeen & they were nice and moist!

nutritional information:

calories per serving: 113, total fat: 2.66g, cholesterol: 18mg, sodium: 300mg, carbs: 21g, fiber: 2.73g, sugars: 13g, protein: 3g.