Showing posts with label less than 150 calories. Show all posts

Monday, February 24, 2014

low fat whole wheat cinnamon rolls (no yeast required!)


I like to think I have pretty good self control. I don't buy shoes just because they're on sale. I make myself coffee at home every day instead of splurging at Starbucks. I avoid eye contact with the Reese's peanut butter cups as I'm checking out of the grocery store. 

But, we all have our weaknesses, and when it comes to the smell of warm, pillowy, cinnamon sugar goodness, I'm a goner. (Seriously, when I'm alone in an airport, I feel like I have to strategically plot my course to avoid any and all Cinnabons.)

In an effort to satisfy these cravings, and not end up missing a flight just to be found under a pile of empty Cinnabon containers, I had to find an easy, healthy, and quick recipe for cinnamon rolls that I could feel good about. These babies don't need any yeast, take about thirty minutes to whip up, and reheat like a dream. Basically, perfection. My self control thanks me. 


I will admit, things start out a little weird, but trust me on this one. Applesauce is cut into the flour mixture to get the dough started. You can use a pastry cutter for this, but I prefer to use two forks - the last thing I need is another kitchen gadget! Then, the almost-dough gets chilled for ten minutes.


This is a very handy time to get your cinnamon-sugar mixture together and get your butter melted for the filling. (Wouldn't be a cinnamon roll without it!)
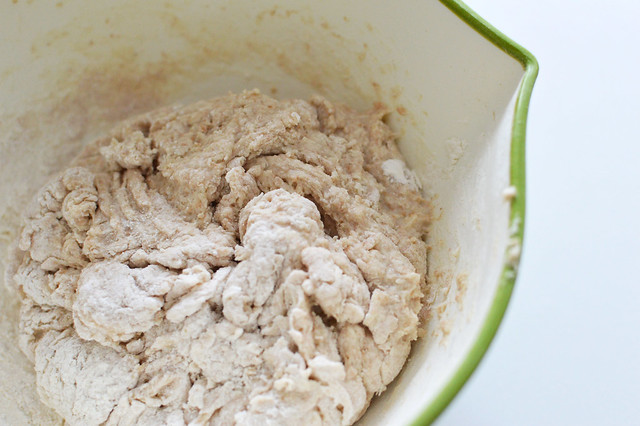

With the addition of milk and vinegar, the dough comes together easily. I did 80% of the work in the bowl and finished the kneading off with my hands on the counter. Feel free to add a little more flour if your dough is too tacky. 
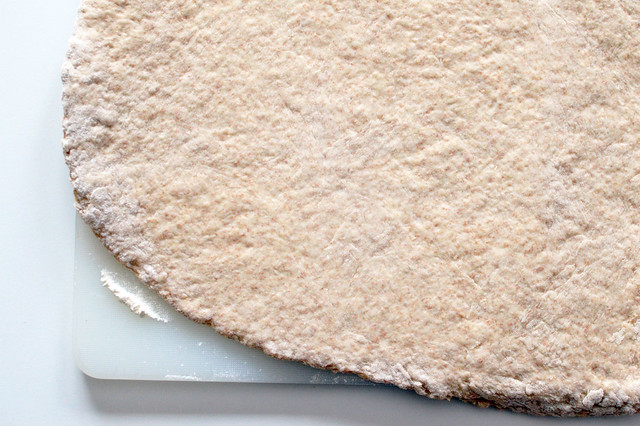

Once you get your dough rolled out to about a 1/2 inch thick, things started to get a little messy. At this point, you want to brush on the melted butter, sprinkle the cinnamon sugar mixture evenly, and roll the dough into a log. Once it's rolled up, you can even out any bulges - I find my middle to always get a little thicker than the rest. Then, slice your log into twelve even sections.
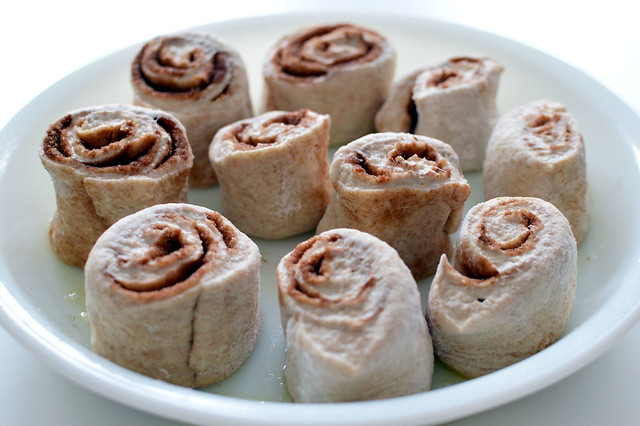

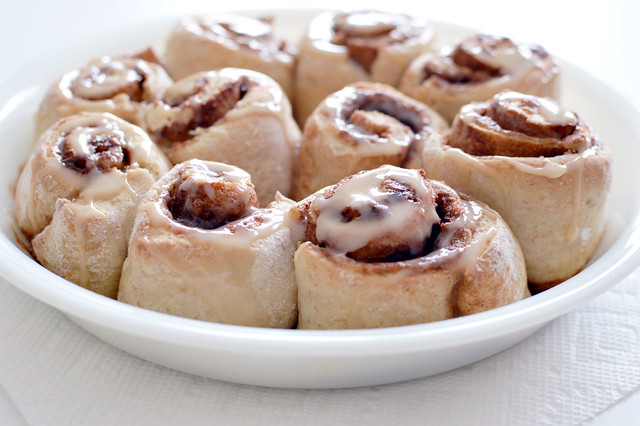
Okay, okay. You caught me. I totally said twelve, but only have ten. It was early and I was feeling generous! Either way, you want to make sure you space your rolls out so they have room to grow and bake all the way through.


When they come out of the oven twenty minutes later they will look so good even your kitten will want one. But, if you let them cool for a few minutes while you make a quick icing, they will be taken from "so good" to "life changer". 


And they totally are.


Healthy Whole Wheat Cinnamon Rolls (No Yeast Required!)
Yields 12 servings

Ingredients

1 cup all purpose flour
1 cup whole wheat flour 
2 1/2 teaspoons baking powder
1/2 teaspoon salt
5 tablespoons unsweetened applesauce (I used one small container)
1/2 cup skim milk (can substitute almond)
1 teaspoon white vinegar 
1 tablespoon butter, melted
4 tablespoons sugar 
2 teaspoons cinnamon

3 tablespoons powdered sugar 
1-2 tablespoons skim milk
1/4 teaspoon vanilla


Directions

1. Preheat oven to 400 degrees.
2. In a large bowl, combine flours, baking powder, and salt. Add applesauce and combine until shaggy. Chill in refrigerator for ten minutes.
3. Combine 3 tablespoons sugar with cinnamon and mix.
4. Melt butter and let cool.
5. Remove dough from refrigerator and add milk, vinegar, and remaining 1 tablespoon of sugar. Combine until dough comes together into a tacky ball. Remove from bowl and knead, adding extra flour if necessary. 
6. Roll dough into an oval shape, about 1/2 inch in thickness.
7. Brush on melted butter, sprinkle with cinnamon sugar mixture, and roll into a log. With a sharp knife, cut into 12 even sections.
8. Grease a pie pan and place rolled sections cut side down. Space evenly for even cooking.
9. Bake for 20-25 minutes or until puffed and golden brown.
10. While rolls cool, combine powdered sugar, milk, and vanilla. Pour over rolls and enjoy!

Note: These reheat fantastically in the microwave! 
Vegan Option: Substitute Earth Balance for butter and almond milk for skim.

Nutrition:

Calories: 111, Fat: 1g, Carbs: 25g, Protein: 3g

Happy baking!

Amanda

Sunday, May 22, 2011

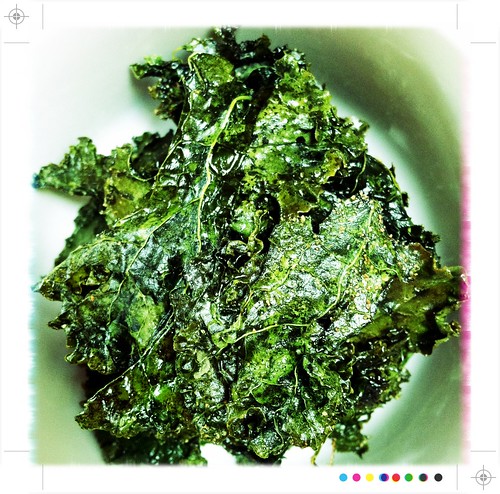
baked kale chips


i'm officially moved! well, for right now any way. we don't get to move in to our new apartment until early next month, so for right now we're crashing at my mom's house. she lovingly took both us and our cats in, effectively tripling the number of residents under one roof, but we're going to do our best to make it up to her with dinners out, short vanilla lattes and amazing company.


this isn't a sweet post, but i haven't had the energy to break out my stand mixer and whip something fancy up. instead, i've decided to go healthy, vegan and savory and make some baked kale chips. i know i'm a little late to jump on this super delicious bandwagon, but i snagged a bunch at the store today and decided to whip these up for a snack. 


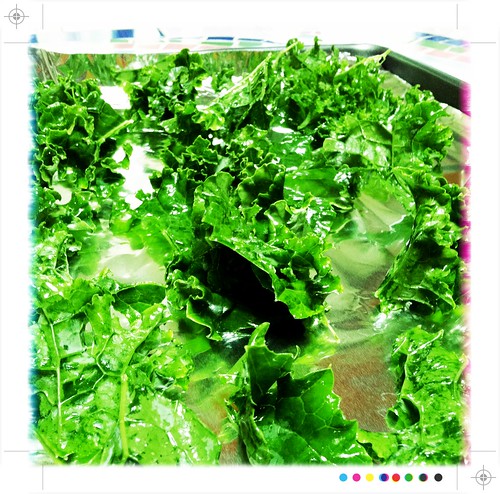
i filled two baking sheets with kale and it was enough snacking material for two people. it may seem like you're making a ton initially, but i promise that when it wilts down you'll be glad you over-did it.


i sprinkled my chips - and yes, they are crispy and savory enough to use that term - with some garlic powder before i popped them in the oven. the beauty of this recipe is that it's totally customizable and you can really make them whatever "flavor" you're craving. my boyfriend suggested that we grab some ranch powder from the store to spice up the next batch. if nothing else, these will be far healthier than any bag of cool ranch doritos. 

baked kale chips

yields two snack-sized servings

3-4 leaves of kale, torn
1 tablespoon olive oil
garlic powder, sea salt, or other spice to taste

1. preheat oven to 300 degrees.

2. wash and tear kale into chip-sized pieces, leaving out center heart.

3. lightly toss kale in olive oil until evenly covered - a little oil goes a long way!

4. line two baking sheets with foil (makes for easy clean-up!) and distribute kale evenly along sheet. i place mine side-by-side with a little breathing room between them. you want to give them enough space to flatten down without touching each others - this makes for extra crispiness! 

5. bake kale in oven for 20-25 minutes or until chips lift easily off sheet. if you're doing two racks, make sure to check the lower sheet earlier (it will bake quicker!) and give them top one a little more time. my lower sheet was done at around 17 minutes, while my upper needed 21 or 22. 

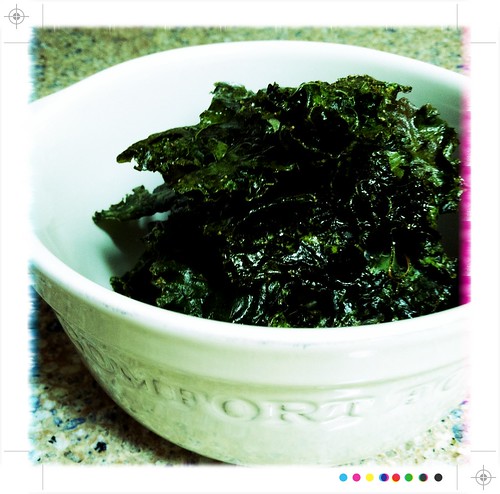
6. once baked, carefully peel chips off foil and place in bowl. eat while warm!

nutritional information:

(note: this info is for 2 cups of raw kale & 1/2 tablespoon of olive oil)

calories: 132, fat: 3.9g, cholesterol: 0.0 mg, sodium: 146 mg, potassium: 146.2 mg, carbs: 7.3 g, fiber: 2.6g, protein: 2.5g. 


thanks for reading & happy baking!

amanda

ps: please excuse my less-than-gorgeous photos. i'm hoping to get my camera unpacked and my mini-studio set up sooner rather than later. figured some photographic documentation was better than nothing!

pps: thank you to all those who have sent me lovely little messages or comments of encouragement. your words keep me excited about baking!

Sunday, April 17, 2011

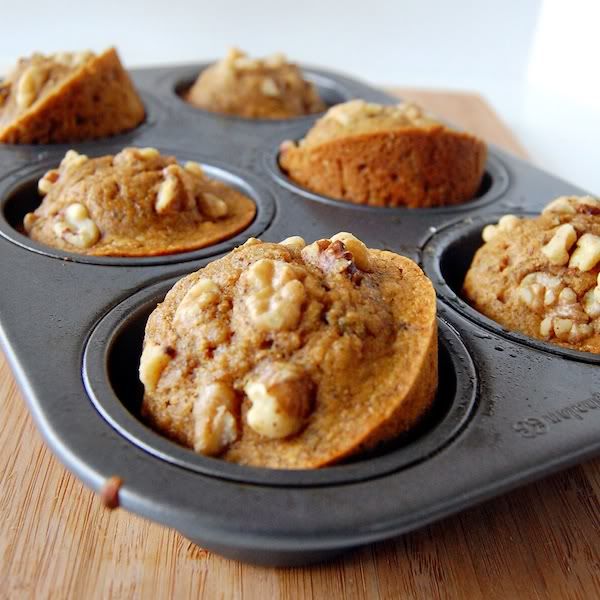
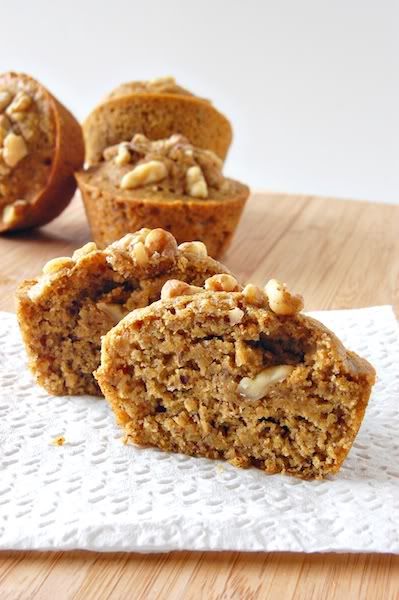
vegan banana flax walnut muffins


let's say that mother nature won't let you pack up your winter clothes and all you want is consistent weather. or let's say that your crest white strips are making your teeth sensitive (and, to add insult to injury, your boyfriend says its because you've been watching too much real housewives). let's say you're definitely moving in a month and are freaking out about getting everything packed. or maybe you just finished the "intermediate" running level on your favorite running app and now you're afraid to move up to "advanced". 

let's say you feel crazy because of all the changes, big and small, and just want a simple muffin to make you feel better. and, let's say, banana bread always reminds you of your mom. auto-comfort. 

and, well, maybe those are less hypothetical than i made them out to be. 

the biggest one being that we are officially packing up and moving 500 miles to washington dc in a few weeks. needless to say, i'm a little stressed out about the whole thing. this might translate into baking-overload, or into having very little time to whip anything up - we'll see! just know that if it's the latter than i haven't forgotten about you.


now that that's out of the way, let's talk muffins.

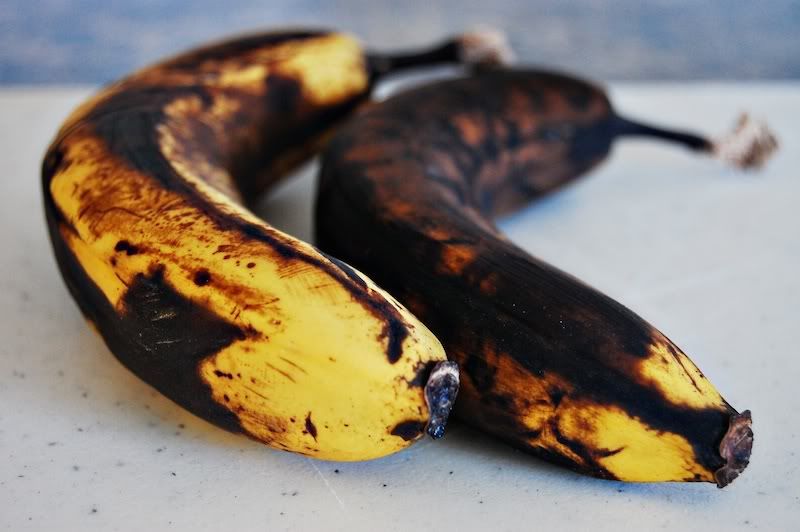
i would be lying if i said that sometimes i didn't let bananas overripe on purpose, just so i could make banana bread. these were getting so bad you could smell them from the hallway, so last night i decided to turn the recipe i used a few days ago into muffins to see if it translated. lucky for me, it did!


i beefed things up nutritionally by using whole wheat flour, unrefined sugar, and flax meal for extra oomph. everyone at work has been trying to be more conscientious about what they are eating, so i want to bring them something a little healthier than my normal fare. 


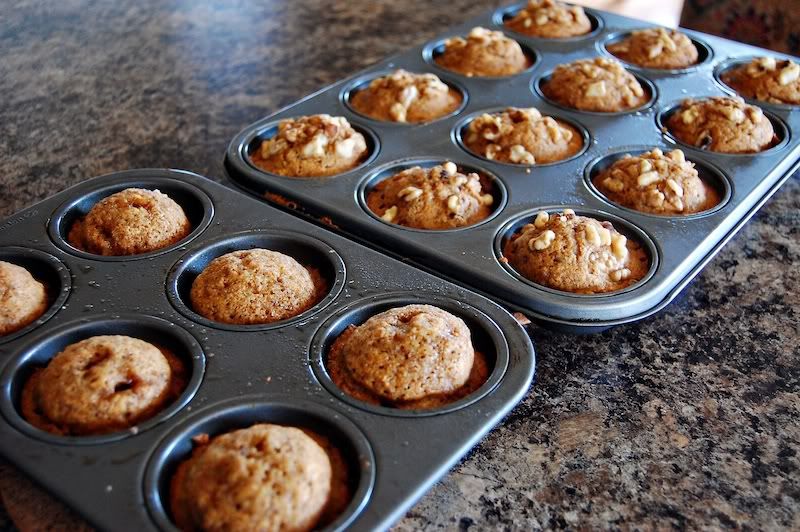
i ended up making a dozen with walnuts and six without, just incase anyone wasn't feeling nutty (though i sure will be) and/or there was a nut allergy issues. feel free to substitute almost anything in this recipe for another comprable ingredient. how about cranberries and almonds? the muffin is your oyster, get creative!


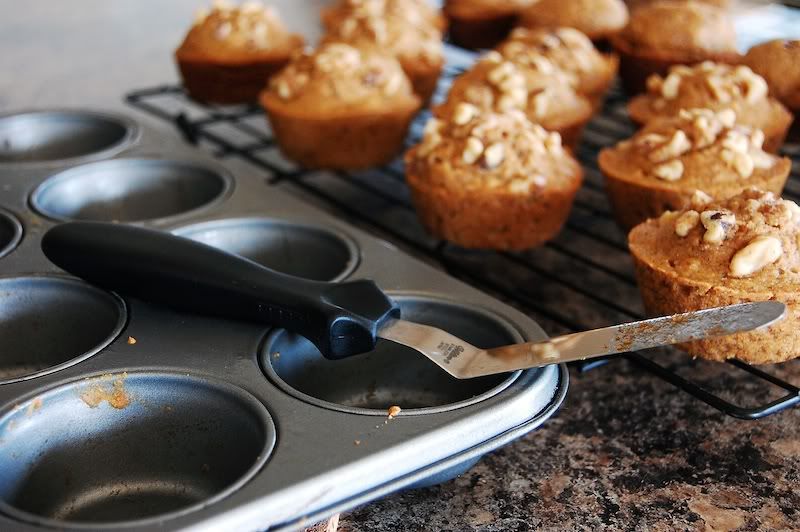
i wanted to pay a quick compliment to my offset spatula, one of my all-time favorite and all-time used baking supplies. i use it to frost cakes, wedge muffins out of their tins, smooth cream onto whoopie pies, scrape peanut butter from the bottom of the jar when i'm having a late-night craving, and..well, you get it. 


i had almost three of these for breakfast this morning (note: does not include the batter i shamelessly licked from the inside of the bowl during my "prewash" cycle of dish washing). they're that good. 


vegan banana flax walnut muffins

yields 18

2 1/2 cups whole wheat flour
1/2 cup raw sugar
3 tablespoons flax meal
1 1/2 teaspoons baking soda
1 1/2 teaspoons cinnamon
3/4 teaspoon salt
2 overripe bananas, mashed
1 1/2 tablespoon vegetable oil
1 1/2 teaspoon apple cider vinegar
1 1/4 cup water
1 1/2 tablespoons maple syrup
1/2 cup walnuts, chopped


1. preheat over to 350 degrees and grease muffin tins.

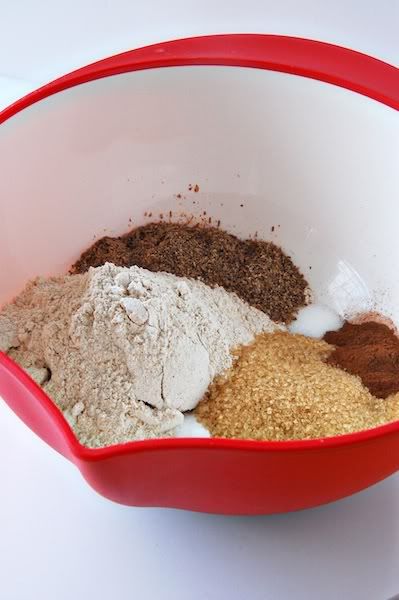
2. in a large bowl whisk together flour, sugar, baking soda, cinnamon, flax meal, and salt until well combined. add mashed bananas and continue to mix until mostly incorporated. (note: it will be lumpy-looking, but i use two forks and "cut" the bananas into the mix like i would butter in a biscuit recipe!)

3. add maple syrup and water and stir until mostly dissolved.

4. make two wells in the bowl (i used the back of a tablespoon) and pour vinegar in one and oil in the other. pour water mixture over everything and stir until just combined.

5. fill muffin tins until 3/4 full and bake for 18-20 minutes or until a toothpick inserted into the middle comes out clean.


nutritional information:

calories: 125, fat: 3.7g, sodium: 203mg, carbs: 21g, fiber: 3g, sugars 7g, protein: 3.19g. 


as always, thanks for reading & happy baking!

amanda


ps: i JUST noticed that my image bandwidth has been exceeded (what?!) and will need to figure out what to do about that. in the meantime things should be up and running, but if my photos go offline in the near future it's just because i'm doing some upgrades. thanks y'all!


Tuesday, April 12, 2011

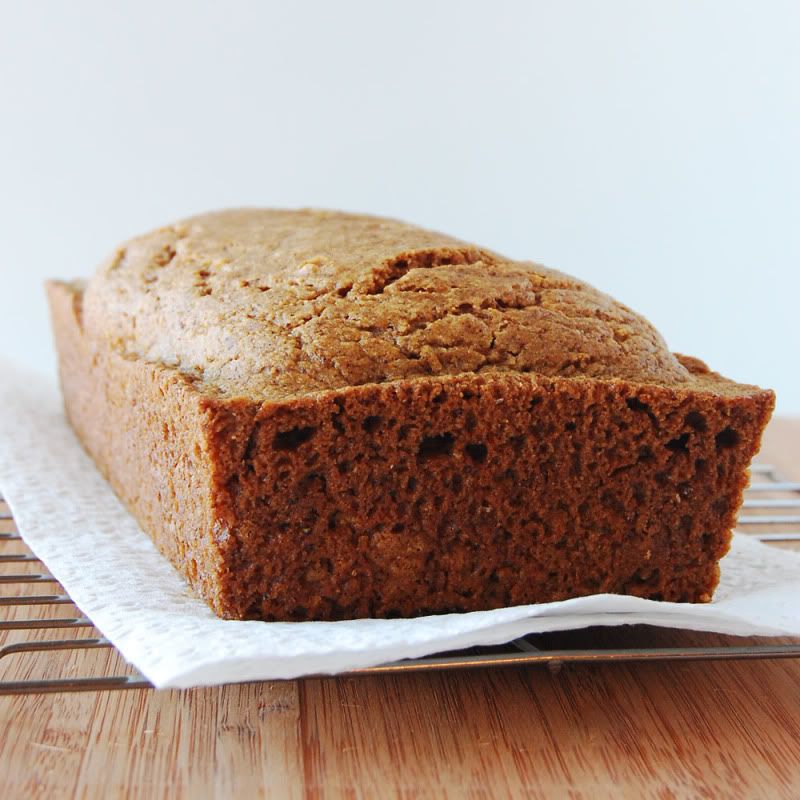
low-fat vegan ginger lemon quick bread


this recipe is amaaazing. yup, it deserved two extra a's. part of why it's so good is that it took me about ten minutes to make and i used a grand total of one bowl. considering how much i detest washing dishes - i always end up looking like i was sitting in the splash section at a dolphin show - this is a very good thing.


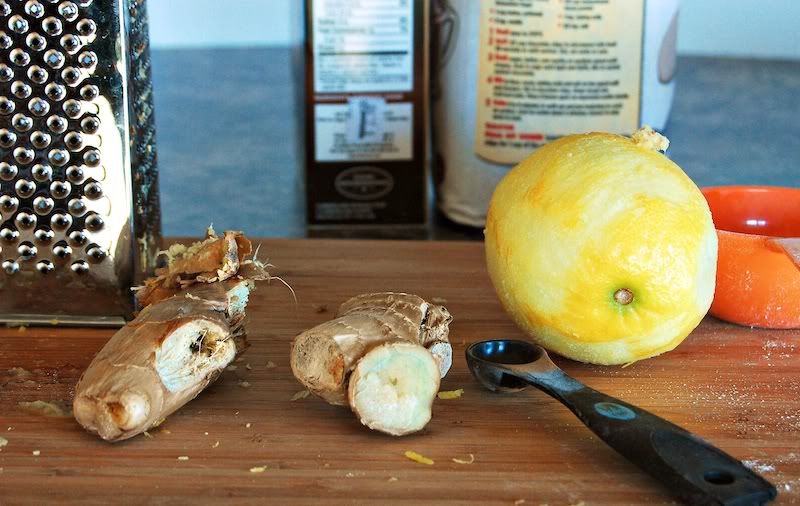
i had some leftover ginger from my sore throat days a few weeks ago when i would drink what seemed like gallons of ginger lemon tea every day, so i decided to pump up this lemon cake with a little heat and spice from the freshly grated ginger. if you don't have any on hand feel free to use pre-grated stuff or omit it all together. no worries!


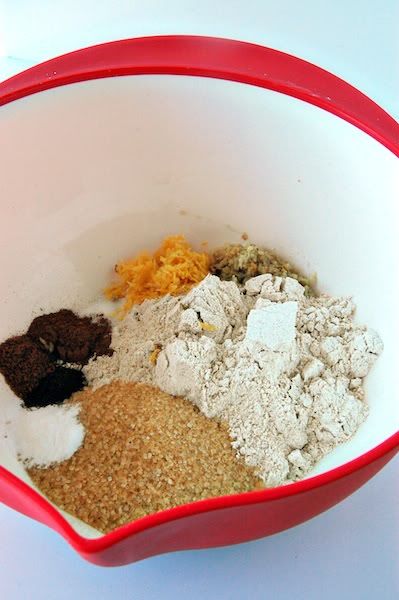
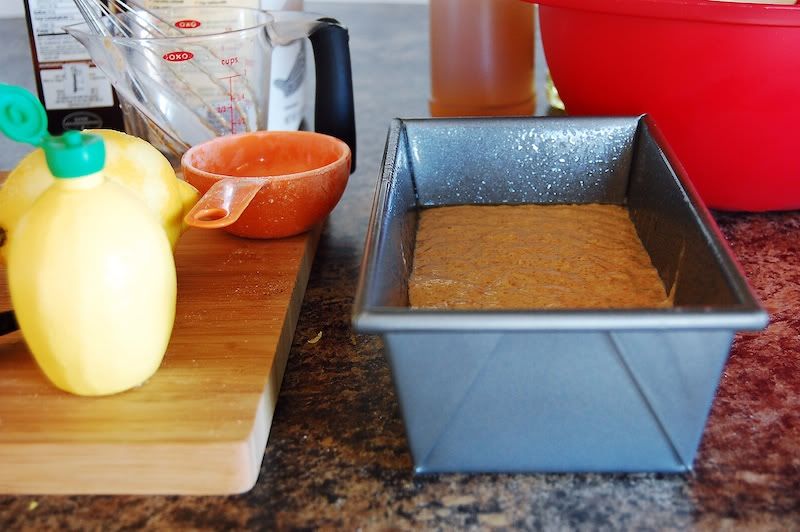
here is the super complicated first step of the recipe. yup, you have to put all the dry ingredients in a one bowl and give them a good mix. that's it!


(this is just proof at how messy my workstation can get. seriously, stuff everywhere!)


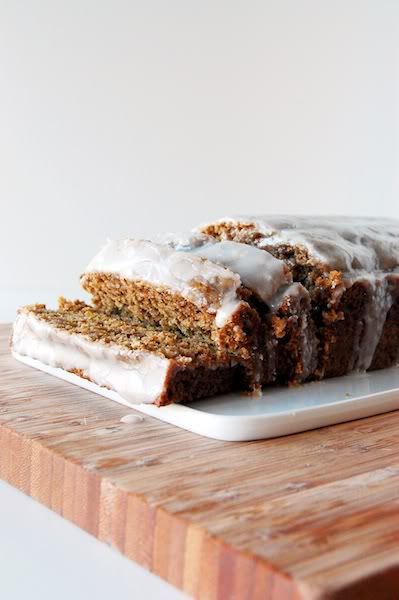
i decided to balance the spicy and sour cake with a lemon-honey glazed that brought everything together. you can feel free to skip this step, but you know i always vote for a glaze if i have the option.

woah! oh geez, i almost forgot to tell you the most magical and unbelievable part of this recipe. get ready. are you ready? okay, just make sure you're sitting down. this entire cake has only one tablespoon of fat. that's right. ONE. did i blow your mind or what? this means that each serving has only one gram of fat. totally insane.


low-fat vegan ginger lemon quick bread


adapted from budget bytes
yields 12 slices

for the cake:

1 1/2 cups whole wheat flour
1/2 cup raw sugar
1 tsp baking soda
1 tsp cinnamon
1/2 tsp nutmeg
1/2 tsp cloves
1/2 tsp salt
1-2 tbsp freshly grated ginger
2 medium lemons, zested and juiced
1 tbsp vegetable oil
1 tsp apple cider vinegar
1 cup water
3/4 cup powdered sugar

1. preheat your oven to 350 degrees.

2. in a large bowl whisk together flour, sugar, baking soda, cinnamon, nutmeg, salt, cloves, lemon zest and ginger.

3. make two wells in the dry ingredients and pour the vinegar in one and the oil in the other. pour water over everything and stir until everything is just combined.

4. pour batter into a greased loaf pan. bake for 30-35 minutes or until a toothpick inserted in the center comes out clean.

5. while cake is cooling combine powdered sugar and lemon juice until it reaches your desired consistency. wait until the cake is completely cooled to pour glaze or risk it melting off!


nutritional information:


calories: 112, fat: 1.3g, cholesterol: 0mg, sodium: 204mg, carbs: 24g, fiber: 2.11g, sugars: 12g, protein: 2.16g. 


thanks for reading & happy baking!


amanda
Tuesday, March 29, 2011

top secret recipe: my sister's chocolate chip cookies


prepare yourself. this recipe is going to change your life. but first, a totally adorable childhood photo and a story:


my little sister sarah is actually the baker in the family. she's been coming up with delicious recipes since before she was old enough to safely use an oven and her chocolate chip cookies are, by far, the most addictive of them all. when she came to visit me this weekend she whipped up a batch and it has taken every ounce of willpower i have not to eat them all in one sitting.

before we made these this weekend she had always kept the recipe super secret. she never wrote it down, did the entire thing basically by sight, and the cookies always came out perfectly. luck? magic? genius? all of the above?

in her debut as a guest blogger - and let's be real, it was only a matter of time - she is bequeathing the recipe to you all. i know, i'm psyched too. to be honest, i'll be making triplicates and opening a safe deposit box just to keep them. i suggest you all do too. 


for someone who is a total control freak (me) and measures out everything (me) i was astounded when my sister just started pouring measurements out in her hand. she's a total professional. 


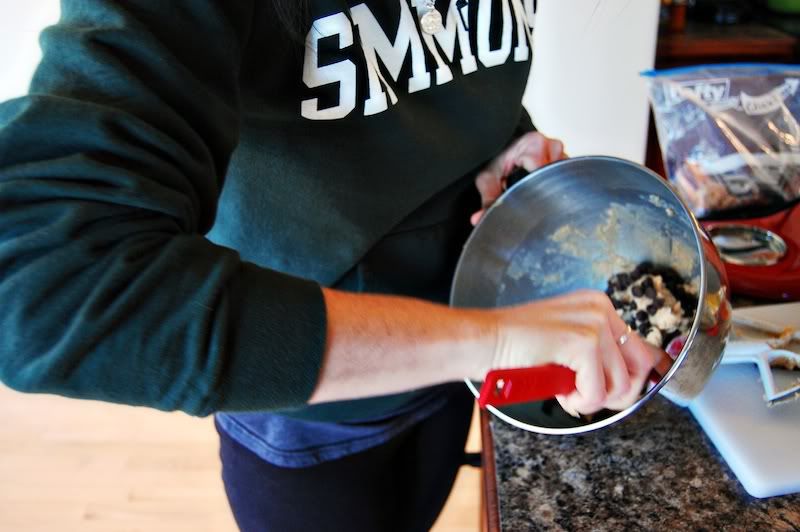
my favorite job since day one has always been mixing in the chocolate chips and this weekend was no exception. there is just something about folding in these morsels of goodness into an already outstanding dough base. 


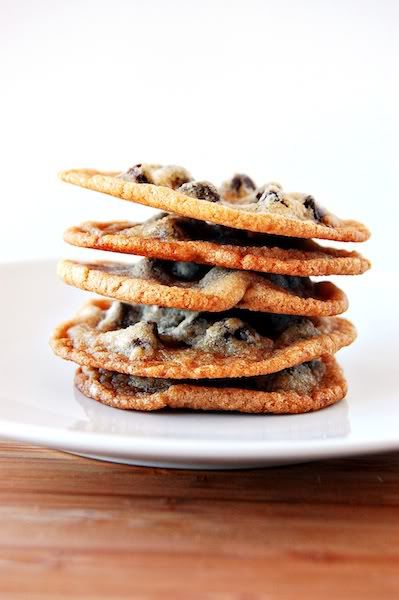
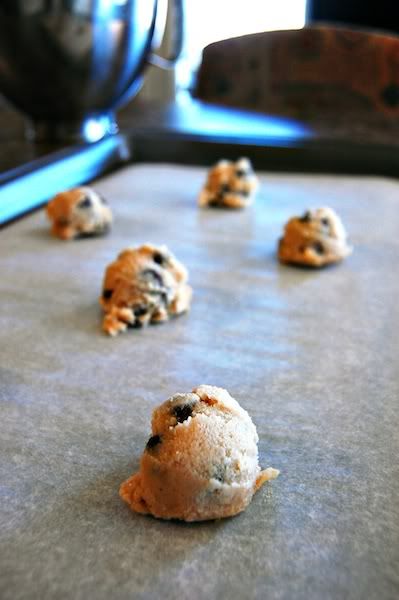
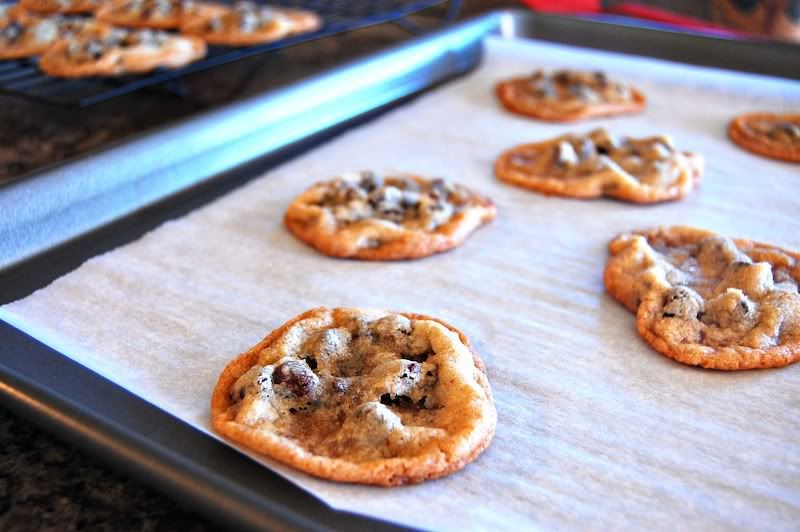
i'll warn you, these cookies are spreaders. i ended up doing six to a sheet to make sure that i didn't get a giant cookie blob, so make sure to leave your cookies some room to breathe.


another warning, these cookies take on these amoeba shapes that i find completely endearing. this is a homemade-looking cookie. no chips ahoy circle perfection in this recipe, which is reason #92832 why it is fantastic.


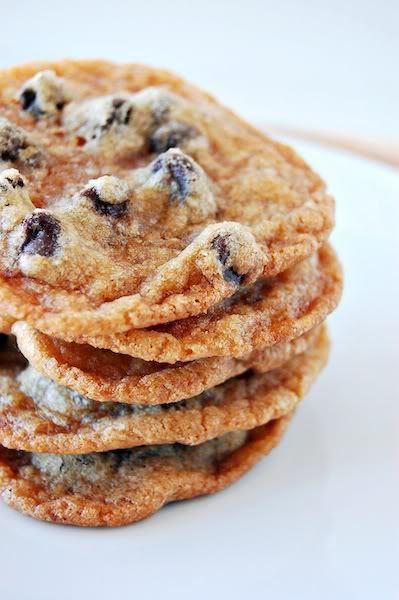
and, as if you need another excuse to make these cookies, i'm going to end with a gratuitous close up. just try to resist.


sarah's top secret chocolate chip cookies

yields 4 dozen


ingredients:

1 cup unsalted butter
1 cup brown sugar
1 cup white sugar
1 egg
1 tsp vanilla
1 1/2 cups all-purpose flour
1 tsp baking soda 
1 1/2 tsp salt
2 tsp cinnamon
1 1/2 cups chocolate chips 


1. preheat oven to 350 degrees fahrenheit and line baking sheet with parchment paper.

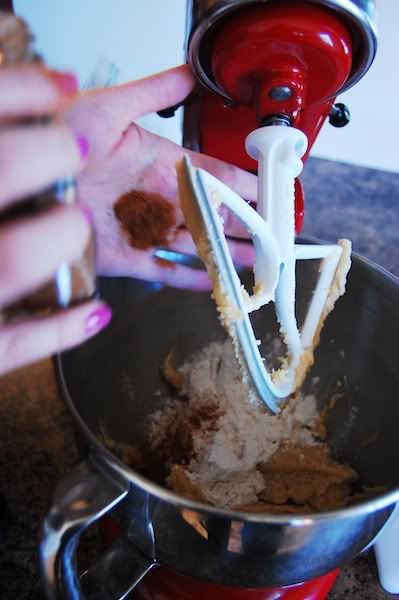
2.  cream sugars and butter in the stand of a mixing bowl until light and fluffy. add egg and vanilla and mix until evenly combined.
3. add flour, baking soda, salt and cinnamon to mixing bowl and combine.

4. add chocolate chips and stir by hand until evenly distributed.

5. drop cookies six to a sheet and baking for 8-12 minutes or until golden brown, rotating halfway through.

6. let cookies rest for 2-3 minutes on baking sheet before carefully transferring to wire rack.


nutritional information:

calories: 108, fat: 5.21g, cholesterol: 14mg, sodium: 102mg, carbs: 15.06g, fiber: 0.46g, sugars: 11.51g, protein: 0.78g. 


thanks for reading & happy baking!

amanda


Sunday, March 6, 2011

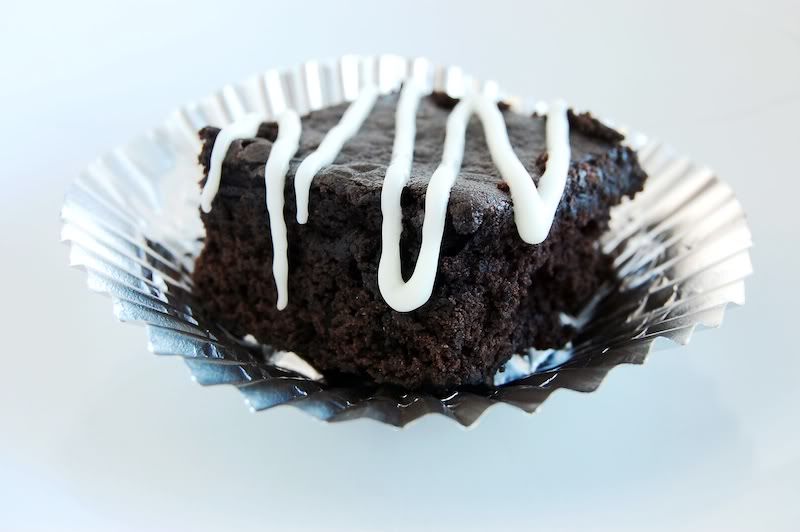
deep dark brownies with white chocolate drizzle


now, i'm not here to tell you that i'm a top chef. or an iron chef. i'm not even a rachael ray. but, i will say that these brownies are outstanding and maybe, just maybe, worthy of one of those titles. except the rachael ray one, she's down right annoying. 


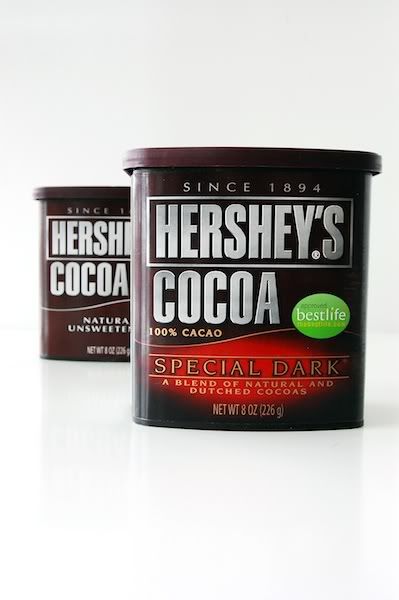
the secret to my success* lies in using the cocoa with the highest percentage of cacao you can find. essentially, the darkest chocolate powder. this makes the brownies almost black in appearance and extremely rich in taste. 

* note: i define success by how much batter gets eaten before anything actually gets baked. in this case, it was a lot.


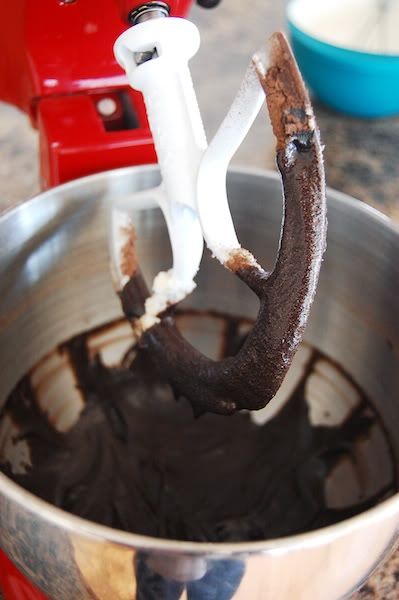
this recipe goes pretty smoothly until about halfway through where you will be told to randomly mix milk & cocoa into the batter. i'll be honest, the first time i made this i was caught a little off guard, with the general rule-of-baking-thumb being to mix the dry and wet ingredients separately until the very last step. but, i trusted the process and soldiered on. what i got was a semi-curdled chocolatey pudding that did not seem anywhere near brownie consistency.

i'm here to tell you, don't do i what i did (which was panic). take a deep breath and know that this little hurdle is simply there to weed out those who couldn't handle the intense brownies to come. you can make it through this - i believe in you!


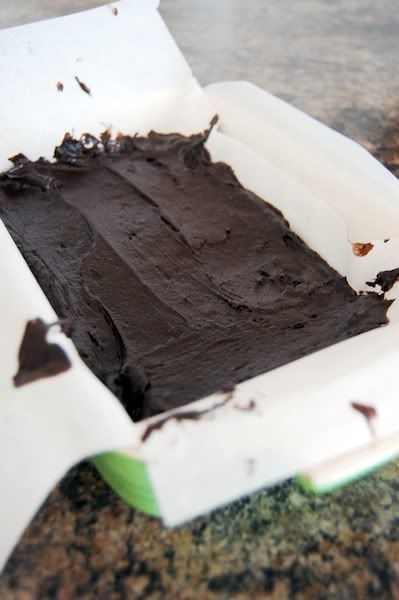
i generally line my pans with parchment or aluminum foil when i make brownies because one too many times i've been left with a brownie bottom with so many craters it looks like the face of the moon. by using a lining (versus spray), i can pull out my whole loaf without the fear of stickage.

another helpful hint when it comes to brownies is to let them cool for as long as you can stand it. i let mine rest in the pan for almost a full hour before i slid them out and let them continue their journey to firm-dom on a wire rack. basically, you want them to be completely room temperature when you slice them up or risk there being a lot of crumbs and broken pieces.


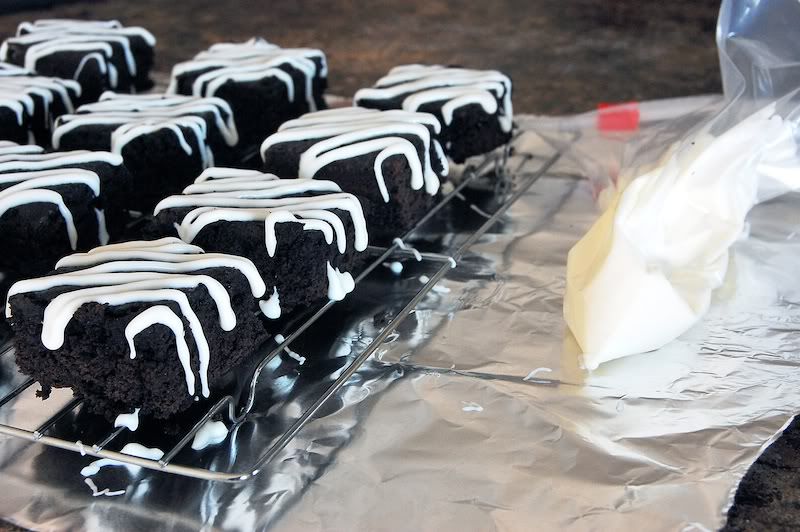
i got a very oreo-vibe from this recipe, in both taste and appearance, so i decided to top them off with white chocolate drizzles. i actually wanted to title this recipe "faux-reo brownies", but i didn't know if that was just too cheesy. if i get enough support from the internet, though, i just might change it. 

this recipe is also fantastic because of its versatility. while making it i was thinking about how delicious mint chocolate chips would be mixed in the dark chocolate, or walnuts, or a vanilla buttercream topping, or caramel, or sea salt, or potato chips! listen, sweet & salty is a thing. 

if you come up with a creative take on this base let me know!

deep-dark brownies with white chocolate drizzle (or, faux-reo brownies!) 

yields 2 dozen squares
adapted from cooking light

ingredients:

1/2 cup butter, softened
1 1/2 cups sugar
1 teaspoon vanilla extract
2 large egg whites
1 large egg
2/3 cup unsweetened 100% cacao cocoa
1/2 cup skim milk
1 1/2 cups all-purpose flour
1/2 teaspoon baking powder
1/4 teaspoon salt

1. preheat oven to 350 degrees and line 13x9 inch pan with parchment or coat with cooking spray.

2. cream butter and sugar together until fluffy. add egg whites and egg, one at a time, beating will afer each addition. add vanilla and combine.

3. add cocoa and milk and beat - this is where it may appear curdled!

4. combine flour, baking powder, and salt in a separate bowl and mix with a whisk. 

5. add flour mixture to cocoa mixture 1/2 cup at a time on low speed until just combined. overmixing leads to tough brownies!

6. spoon batter into prepared pan and spread evenly.

7. bake for 30-35 minutes or until set. cool for 1-2 hours.

8. optional: once completely cooled, slice with a serrated knife or pizza cutter into even squares. melt 1/2 cup white chocolate in microwave on low until melted. pour chocolate into a ziploc baggy, cut at tip, and drizzle onto brownies. place in refrigerator to set for 10-15 minutes.


nutritional information:

cals: 142, fat: 5.22g, cholesterol: 19mg, sodium: 74mg, carbs: 22.4g, fiber: 1g, sugars: 14.72g.


as always, thanks for reading & happy baking!

amanda

ps: oh! and check out the newly-created about me page and my recipe index!

Sunday, February 6, 2011

vegan ginger cookies with lemon royal icing


okay guys, i have a confession to make. it's not something i'm proud of, but admitting you have a problem is the first step.

i am not an inclusive baker.

in a world ripe with food allergies and ethical eating i still throw as much butter, flour, eggs and nuts into a recipe as i possibly can. it's not right, but it is delicious.

part of my foray into vegan baking has been as an attempt to make my baked goods available to more people. other bonuses include being forced out of my ingredient comfort zone and being able to make stuff when i use up all the butter & eggs and am too lazy to buy more.
 
i'm really still getting the hang of things - my last few attempts have been quite embarrassing - so any tips & tricks you can throw my way would be amazing.


equal parts molasses, oil, and sugar. i used brown instead of white because..well, it's how i roll. perk: these cookies come together in one glorious bowl. speaking of bowls, i got a new set as an early valentine's day present and i am in baking heaven.


let's veer slightly off topic for a minute. so, like i said, i'm new at this whole vegan-baking thing. to get these cookies the way i wanted them i had to adjust several parts of the recipe. the cookie on the top left-hand side was made according to instructions, but turned out way too mounded and dense for me. 

the next couple i smooshed a little with a glass and they were closer to what i was looking for. the bottom cookie, which i think turned out the best, is the last and final version and the recipe i have posted at the bottom of this entry. 


so, i know that there is a spoon in this shot and that would lead you to believe it was used. honestly? i barely touched it. by the end of the mix-a-thon i was using my hands to get everything combined. it was awesome.


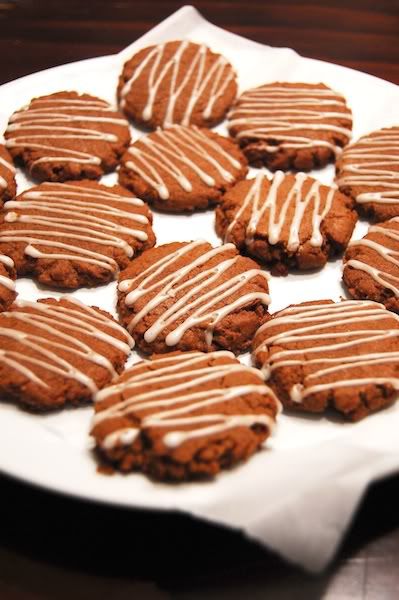
these cookies are dark and spicy and right up my alley, but i couldn't resist adding a little sweetness and acidity through a few squiggles - the technical term - of vegan lemon royal icing. i had to figure this one out, since royal icing is traditionally made with eggs, but i managed!

note: there was no way that for a one-bowl cookie recipe i was going to break out the piping tips. no way, no how. i just grabbed a ziploc bag, poured the icing in, sealed it up, cut a tip hole in the bottom corner and got to icing. painless!


these cookies are actually very delicious, and not even "for vegan cookies". they are great alone, but the icing dresses them up a little bit. alternatively, i think they would be great rolled in some raw sugar. or, not to get crazy, lemon-infused raw sugar!

onto the recipe!

vegan ginger cookies with lemon royal icing

yields 2 dozen
adapted from veggie revolution

preheat oven to 350 degrees f

for cookies:

1/2 cup vegetable oil
1/2 cup brown sugar
1/2 cup molasses
2-3 tablespoons hot water
1 3/4 cups flour
2 teaspoons ginger
2 teaspoons cinnamon
1 teaspoon baking soda
1/3 teaspoon salt

1. in a medium-sized bowl combine oil, sugar, molasses & hot water.

2. stir in flour, ginger, cinnamon, baking soda & salt. combine with spoon/hands.

3. if batter is too dry/sandy add a teaspoon of water a time until it reaches a workable consistency.

4. bake on a parchment-lined baking sheet for 8-9 minutes. cookies might appear under-done, but will harden as they cool.

for lemon icing:

1 cup confectioner's sugar
juice from half a medium lemon
2 teaspoons light corn syrup

1. in a small bowl mix sugar and lemon juice until smooth. 

2. add corn syrup and beat until smooth and glossy. if icing is too thin, add more sugar. if it's too thick, add more juice or corn syrup. 

3. pour into ziploc bag, seal, and cut small hole in bottom corner. decorate away!

nutritional information:

calories: 120, fat: 4.4g, sodium: 80mg, carbs: 19.22g, sugars: 10g, protein: 1g.

thanks for reading & happy baking!

amanda

Saturday, January 29, 2011

whole wheat bagels (for under 150 calories!)


i love carbs. i also love breakfast. those who know me know that it is irrelevant what time i actually wake up, breakfast-y things must be my first meal. if they aren't, my whole day is completely thrown. 

when i began to understand nutrition and what i actually should be eating the beautiful, carby, doughy breakfast staple known as the bagel was completely phased out of my life. i could not find a reasonably nutritious bagel anywhere and was resigned to pulling the somewhat depressing scooping-out maneuver whenever i had no choice but to eat one. 

well, my friends, today is one for the history books. i've successfully made delicious and authentic boiled bagels that are less than 150 calories a piece. to give you a comparison, a plain bagel from panera bread has double the calories, fat, cholesterol, with only half the fiber. and that's without cream cheese! how embarrassing.

while interacting with yeast is something i shamefully try to avoid, the idea of being able to make my bagel and eat it too far outweighed my fear. this is a great recipe to try out if you're new to working with yeast, which you always want to mix with warm - not hot! - water to bring it back from the dead (or "activate" it, to be more scientific). i always buy the instant yeast in small packets and keep them in my freezer. 

speaking of freezers, this is also a great recipe to make and then freeze - especially because it makes a baker's dozen. i left a few bagels out for breakfast tomorrow, but cut the rest in half and stuck them in an airtight bag in the freezer. that way, the next time i want a carby treat i can just pull one out and put it in the toaster for around double the time i would a fresh bagel. super easy!


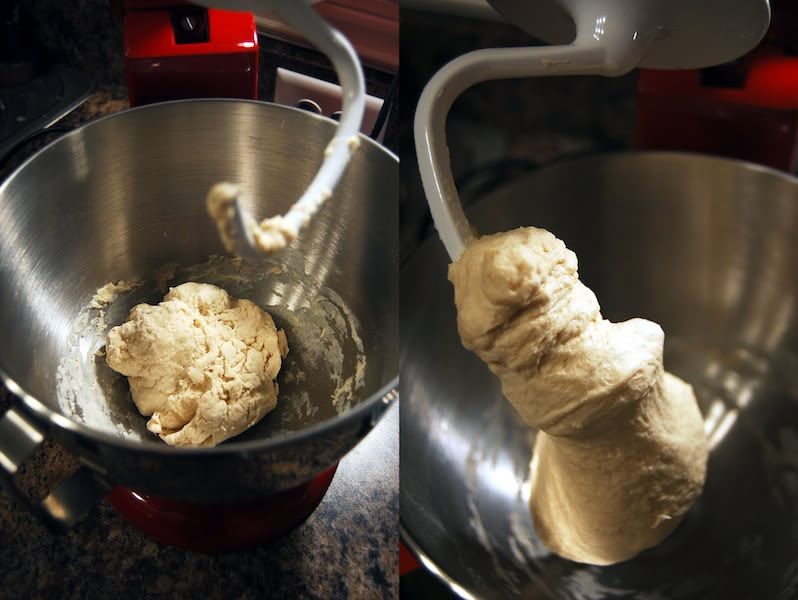
you're going to need a stand mixer and a dough hook for this recipe. you want the dough to end up smooth & not sticky!


at around 7am i was standing in my kitchen with a ball of dough in front of me when i realized i had absolutely no idea how to form bagels. i know this may seem like an important step in researching a recipe, but i was so excited to make bagels in the first place a lot of my common sense flew out the window. i ended up finding this really helpful tutorial that shows you exactly how it's done, starring a man who i now refer to as my bagel sensei. you can check out his multi-step video right here!

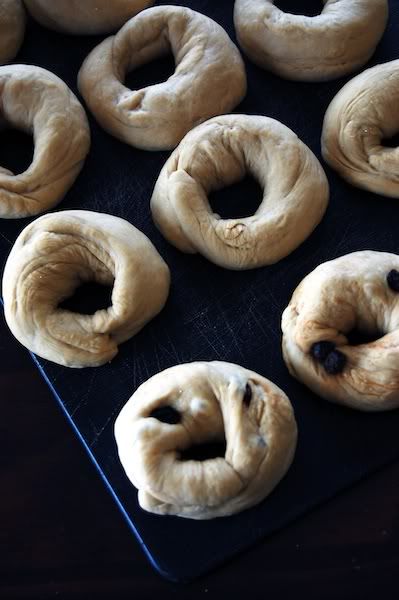
oh, and if you don't have enough reasons to start making these immediately here's another one: they are totally customizable. i made a bunch of cinnamon raisin by sticking ten or so raisins and a splash of cinnamon in the dough before rolling them into circles. the only tip i have is that if you're going to do anything that involves toppings (e.g., poppy seed), wait until they have been boiled, drained and then brushed with a little egg white. this will help things stick while they're baking.


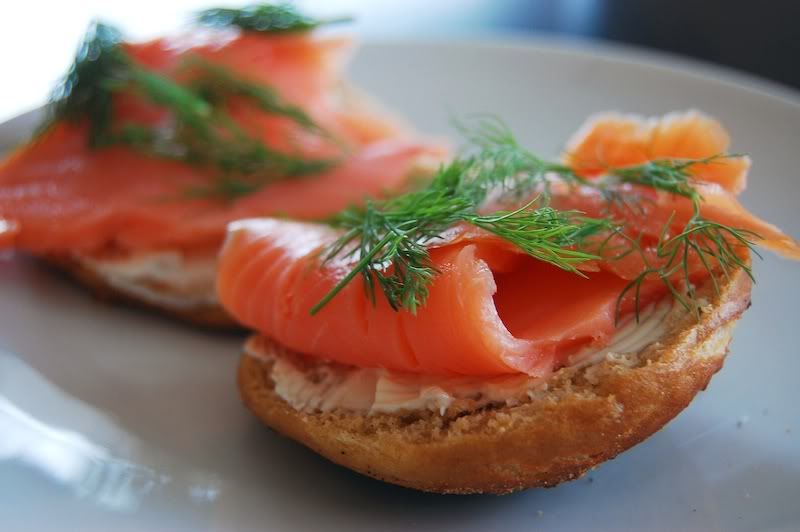
i dragged my other half out of bed this morning and he made himself an everything bagel, which then became this gorgeous lox sandwich. i'm a cinnamon raisin & cream cheese gal myself. you do with your carbs what's right for you.

whole wheat bagels

yields 13 bagels
adapted from beantown baker

pre-dough one:

8 ounces whole wheat flour
¼ teaspoon instant yeast
6 ounces (¾ cup) water

pre-dough two:

2 tablespoons molasses
5 ounces water
8 ounces whole wheat flour
½ teaspoon salt

final dough:

pre-doughs one & two
1 tablespoon water
2 teaspoons yeast
¾ teaspoon salt
7-9 tablespoons flour, plus more if necessary
1 tablespoon baking soda (for boiling)

1. in the bowl of a stand mixer fitted with the dough hook, mix all of the ingredients in pre-dough one on medium-low speed until combined and set aside for five minutes.

2. meanwhile, in a 1-cup measuring cup, stir together the molasses and the five ounces of water in pre-dough two. set aside but stirring occasionally, until the molasses dissolves into the water.

3. return to pre-dough one and knead on low speed for one minute. transfer to a small bowl and cover with plastic wrap or a damp kitchen towel and refrigerate overnight.

4. add the flour and salt for pre-dough two to the empty mixer bowl and with the mixer on low speed, pour in the water/syrup mixture. mix on medium-low just until combined. cover the mixer bowl with plastic wrap or a damp kitchen towel and set aside at room temperature for at least eight hours or overnight.

5. the next day, transfer the refrigerated pre-dough one to room temperature for a couple hours to warm up.

6. when you’re ready to make the final dough, stir together the one tablespoon water and the yeast. In the bowl of a stand mixer fitted with the dough hook, mix both pre-doughs, the water and yeast, and the salt on low speed until combined. while the mixer is running, add in the flour, one tablespoon at a time, until it’s fully absorbed by the dough. then, knead on low speed for 5-6 minutes, adding more flour or water if necessary to form a smooth, firm dough - it shouldn't be sticky.

7. let the dough rise at room temperature until it increases to about 1½ times its original size, about one to two hours.

8. divide the dough into 8-12 pieces, mine came out to around 65g each. shape each piece into a smooth ball, then roll each piece into a rope about ¾-inch thick. bring the ends of the rope together and gently roll them on a flat surface to seal. let the dough rest for about twenty minutes.

9. preheat the oven to 500 degrees and line a baking sheet with parchment paper or a silicone mat. bring at least three inches of water to a boil in a large pot over high heat. add 1 tablespoon baking soda and reduce the heat to medium. gently drop 2-4 bagels (as many as will fit without crowding) into the water, boiling for one minute on each side. place the boiled bagels on a wire cooling rack to drip-dry slightly, about three to four minutes.

10.  place bagels on lined baking sheet and transfer the sheet to the oven, reduce the oven temperature to 450 degrees, and bake until the bagels are browned and feel hard, about 13 minutes for small bagels. (note: the bagels will soften as they cool.)

11. cool bagels on wire rack for 15-20 minutes before enjoying!


nutritional information:


calories: 144, fat: 0.5g, sodium: 226g, carbs; 31g, fiber: 4.5g, sugars: 2g, protein: 5.5g.

thank you for reading & happy baking!

amanda

ps: i know this recipe is long & a bit complicated, so if you have any questions please don't hesitate to ask!

Saturday, January 22, 2011

bran flax morning muffins

i had been curious about flax seeds for a while, mostly because you can hide them in almost every baked good to give them some fiber & omega 3, but was always a little intimidated by something that seemed so, well, healthy.

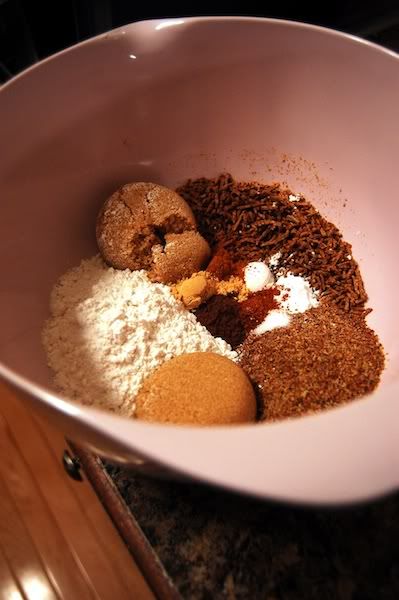
i decided to splurge today and picked up some bob's red mill flaxseed meal from trader joe's for a few bucks. i spied a recipe on the side of the bag while stashing it in my fridge and decided to try it as a good pre-workout snack or quick morning breakfast fix.

yup, i'm starting this blog off on an unexpectedly nutritious foot, but these little muffins are easy & completely customizable.


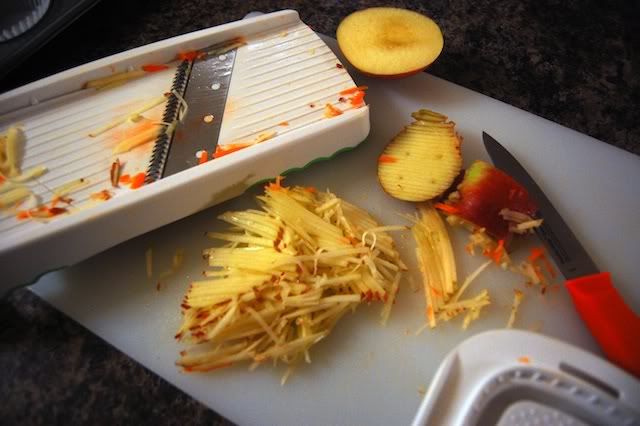
i was thrilled to be able to break out my mandolin, which is basically just a fancy food slicer, to make even apple & carrot matchsticks for these babies. don't have a mandolin? just chop up your ingredients as thin or as coarsely as you like! make it your own!


i ended up editing the original recipe by adding and upping the spices, as well as using cake flour to make sure the muffins were nice and soft.


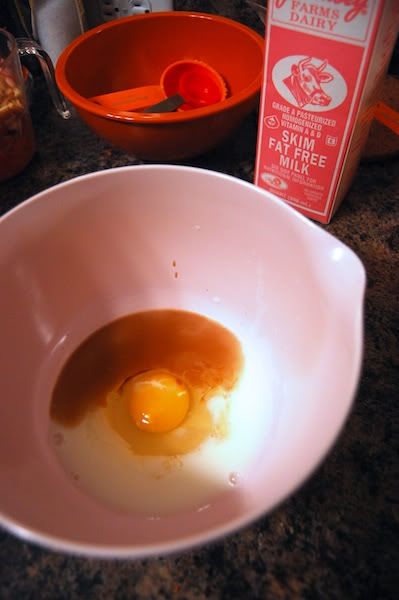
the wet ingredients were super simple, and i got to use the vanilla i brought back from mexico!


i halved the recipe and got a full dozen - three more than the recipe yielded! having leftovers is a serious theme in my baking life. 


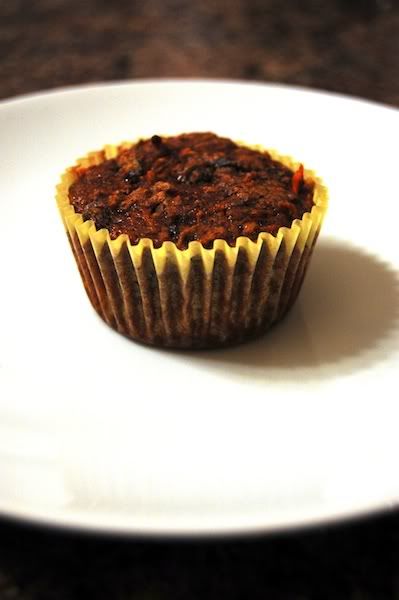
i know they look healthy, but they taste so great! the next time i make these bad boys i might add some chopped walnuts on top for some crunch. either way, good & good for you! also, i have a feeling that these might be easily adaptable into a vegan recipe (almond/soy milk instead of skim & veggie oil/banana for egg?), a food genre i'm more and more interested in.


bran flax morning muffins

yields 24 muffins
adapted from bob's red mill bran flax muffins

1 1/2 cups whole wheat cake flour
3/4 cups flaxseed meal
2/4 cup oat bran cereal 
1 cup light brown sugar
2 tsp baking soda
1 tsp baking powder
1/2 tsp salt
2 tsp cinnamon
1 tsp ginger
1 tsp allspice
1 tsp nutmeg
1 1/2 cups finely shredded carrots
2 shredded apples
1/2 cup raisins
1 cup chopped nuts (optional)
3/4 cups milk
2 beaten eggs
1 tsp vanilla

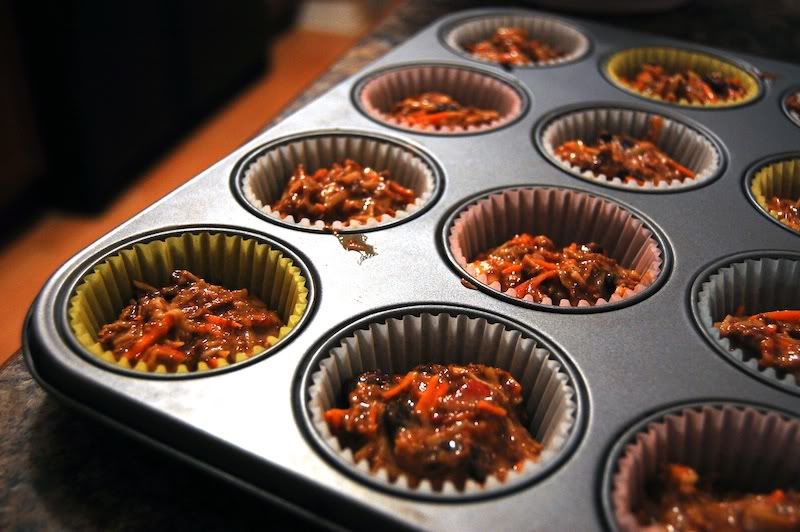
mix together flaxseed meal, oat bran, brown sugar, baking soda, baking powder, salt, and spices in a large bowl. stir in carrots, apples, raisins, and nuts (if desired). combine milk, beaten eggs, and vanilla in small bowl. pour liquid ingredients into dry ingredients and stir until ingredients are moistened. note: do not over mix, this will cause tough muffins.

fill muffin cups 3/4 full and bake at 350 degrees f for 15-20 minutes. i did seventeen & they were nice and moist!

nutritional information:

calories per serving: 113, total fat: 2.66g, cholesterol: 18mg, sodium: 300mg, carbs: 21g, fiber: 2.73g, sugars: 13g, protein: 3g.